How to Prepare Fried Spanish Calamari
Friday, July 25, 2025
I don't know about you, but I am really picky with my calamari (calamares in Spain), and I mean really picky. I won't eat them if they are battered, greasy, soggy or tough. In fact, unless they are spot on, I won't eat them. My wife gets all anxious every time I order Calamares (deep fried squid rings) in a bar because she knows the score. As soon as they are placed on the table she can see in my face if I'm going to eat them or not. Basically, if they are battered or reflect the light, I'm not eating them.
I´m a huge fan of Spanish tapas and Calamares are one of my favourites. But I must admit it took several years to get round to eating them as my first few experiences with Calamares was absolutely terrible; tough, greasy and tasteless. So I pretty much scrapped them from my menu. But it was in a restaurant in Valencia where I developed almost an addiction for Calamares. I tried them again and I was hooked once and for all. They were perfect and became my benchmark Calamares. The restaurant was Marisqueria Cervera and everything about them was ideal. They were not battered but fried in flour. They were dry and incredibly crispy but not at all heavy. The coating was perfect and of course, they were about as tender as they can be. The perfect tapas. If you ever happen to be in Valencia you must pay them a visit. http://www.marisqueriascivera.com
Once you have tried Calamares this good it makes it difficult to enjoy Calamares in other establishments, but I never give up. They are my tapas of choice with a cold beer before lunch. If you have read any of my other posts you will know I like cooking, so naturally, I went on a quest to learn how to make the perfect Calamares and that is exactly what I am going to share with you.
To be quite honest it is really simple but as always the fresher the calamari/squid the better. However, it is not always possible to get really fresh squid so a lot of the time you will not be impressed by the result as they turn out tough and chewy. That said there is a trick of the trade that is used by many restaurants to ensure their calamares are tender to the bite. And lone behold it is milk.
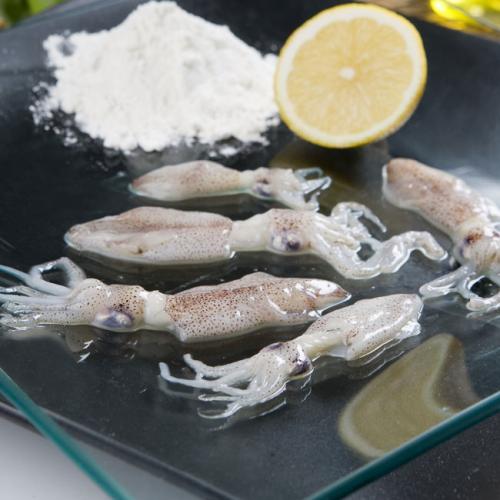
Milk has long been used as a tenderiser for meats but it also works wonders with squid, only, it is essential to add salt to the milk so that the squid absorbs the milk and thus softens the texture and collagen. The amount of salt is approximately half a teaspoon for every 400ml of whole fat milk. The amount of milk necessary will be half the weight of the calamari. So if you have 800 grams of calamari - 400 ml of whole fat milk and 1/2 teaspoon of salt - once mixed place them in the fridge for 12 hours or overnight. If you can get them fresh from the fish market, great you can jump this step, but in the supermarket, they are almost all defrosted squid. When you have your squid, clean them, discard the head and the innards and remove the spinal bone, which just slides out. Then cut up the squid into rings about 1cm in width. The add them to the milk.
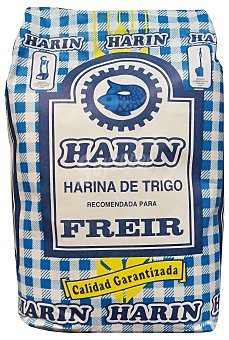 Once tenderised, drain the milk and let them sit in a sieve for about 30 minutes until they have completely drained and come up to room temperature. Dry them with kitchen paper towels to remove excess liquid and then cover them with wheat flour - 'harina de trigo' which is special for frying - it is not as fine as other flours. The one I use is HARIN. Make sure they are covered in abundant flour, so don't put too many in the flour at once. Once tenderised, drain the milk and let them sit in a sieve for about 30 minutes until they have completely drained and come up to room temperature. Dry them with kitchen paper towels to remove excess liquid and then cover them with wheat flour - 'harina de trigo' which is special for frying - it is not as fine as other flours. The one I use is HARIN. Make sure they are covered in abundant flour, so don't put too many in the flour at once.

.jpg)
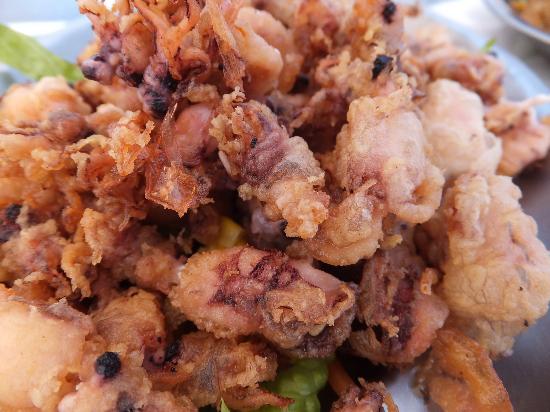
Make sure you have a deep fat fryer or a deep frying pan with abundant extra virgin olive oil. When it is at 170ºC or on the point of smoking you are ready to go - you can use bread to test the temperature - drop in a little bit and observe the colour it turns - it should go golden very quickly.
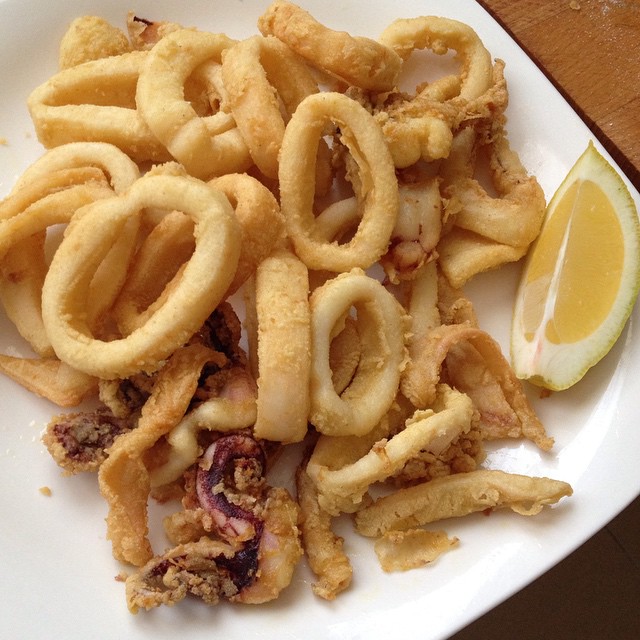
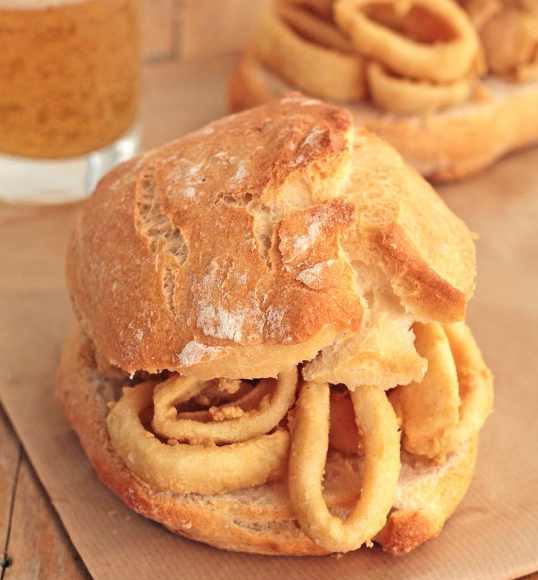 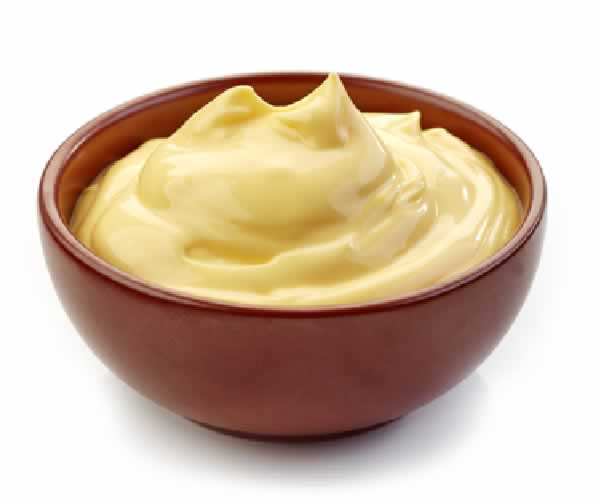
Just before you put them in, squeeze the squid and the flour firmly with your hands and then place in the hot oil. Don't put too many in at once, make sure they have room to move around and aren't on top of each other. Let them go golden crisp and take them out, let then drain properly and then place them on kitchen paper to dry. Ideally, a frying basket is the best tool for this job. Once dry they are ready to eat. Either as they are or with lemon or mayonnaise. Perhaps even in a crusty roll if you want to make more of a meal out of it. Absolutely delicious too.
Enjoy!
 1
Like
Published at 8:39 PM Comments (2)
1
Like
Published at 8:39 PM Comments (2)
My Favourite Summer Snack - Puntilla de Calamar
Friday, July 18, 2025

One of my favourite starters is a Mediterranean classic and one that always gets ordered whenever we have a paella away from home: ‘Puntilla de Calamar’, unbelievably tasty, moreish and easy to prepare. I like to refer to them as "seafood popcorn". The reason we love it so much is not just because of its taste but also because it is a light starter that doesn't kill your appetite before a paella, which can often be quite a heavy meal.
‘Puntillas de Calamar’ are effectively ‘baby squid’ and are eaten all over Spain as a starter but mainly on the coast and normally they accompany rice dishes, as they are light and flavoursome. They are effectively like seafood popcorn and I just can’t put them down when I get going! With or without a little squeezed lemon, they are just fantastic.
You will need for 4 people :
800gr Young Squid – “Puntilla de Calamar” (they reduce in size by around 50% when cooked)
Wheat flour - Tempura
Bread crumbs (optional)
Extra Virgin Olive Oil
Salt
They are extremely easy to prepare and a few details need to be addressed to achieve the best results. Firstly you will need to clean and prepare the ‘puntilla’. This means removing the eyes, which we will then dispose of, and removing the transparent tough membrane that goes along the inner body, effectively like a backbone and it just slides out when you pull on it. Then we thoroughly wash and dry the puntilla. This is the first of the key points that need to be addressed. If the puntilla are not dry the flour with go all stodgy and cause a real mess. So before we flour the squid, make sure it is completely dry.
Now to flour the squid: You can use a sieve or a plastic bag, whichever you find easier. So place the squid in a bag or a sieve, salt them lightly and cover with flour and shake repeatedly, ‘tempura flour’ is best but any wheat flour will work. Here comes another trick, although it is not always done and using just flour will work just fine, a good trick to get a nice and crunchy squid is to blend the flour with bread crumbs in a 50/50 mix. This will give them that crunchy edge which I love. Notice we are not adding egg here, we don’t want a batter, of any sort. Once the squid is completely covered with the flour mix we need to deep fry.
At this point, we need to fry the floured baby squid ‘puntilla’. Lastly, it is very important to make sure the olive oil is very hot, but not smoking. You can test the temperature with a small piece of bread, if it browns fairly quickly, it's ready. The oil needs to be hot so the squid doesn’t soak up any oil and the flour crisps properly, so if you are doing a large batch be careful how many you put in the pan or the fryer as the temperature will drop if you place too many in at once so do them smaller batches and make sure you have abundant olive oil in the pan, so they can float. Once they are golden in colour, remove them and place them on kitchen towel. Dry them and serve immediately with a few lemon quarters.
So there you are an extremely easy starter. Now, this same technique can be used for many types of seafood such as Large squid rings – Calamari (as I explained in a previous blog post) or even large prawns for dipping.
Enjoy!
1
Like
Published at 5:42 PM Comments (1)
The Authentic Salmorejo
Tuesday, July 8, 2025
Believe it or not but ‘Salmorjeo from Cordoba has its own culinary guild which works to make this traditional recipe the ambassador of the city, its culture and cuisine, so each year they organise an event to promote this wonderfully versatile dish. For two days, lectures, panel discussions, cooking demonstrations, tastings are conducted in the city in order to help disseminate the authentic Salmorejo recipe to the rest of the world.
The guild conducted an initiative that turned this star dish into a 'Universal Salmorejo' and thus standardised the recipe and ingredients. As you probably know, it has many variations and every household adds its own personal touch. They wanted to establish a traditional protected recipe, which would become an emblem for the region. A panel of expert tasters approved the recipe after researching the most common proportions between ingredients and rounding them off to a standard.
So I thought I would share this recipe with you all and hope you can enjoy yet another refreshing meal during the scorching heat of Spain's imminent summer.
Ingredients:
- 1 kg of ripe plum tomatoes
- 200 gr. Telera Cordobesa Bread (this is a bread with a thick, heavy dough. Better if it is a day old too) 'Pan de Hogaza' in Spanish supermarkets, if you are not in the region!
- 100 gr. de Extra Virgen Olive Oil
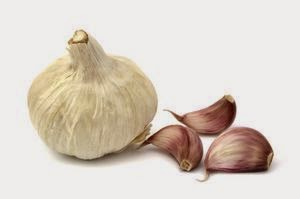
- 1 ‘Montalban garlic’ clove from Cordoba - but any garlic clove will do if you can't find the original!
- 10 gr. de Sal
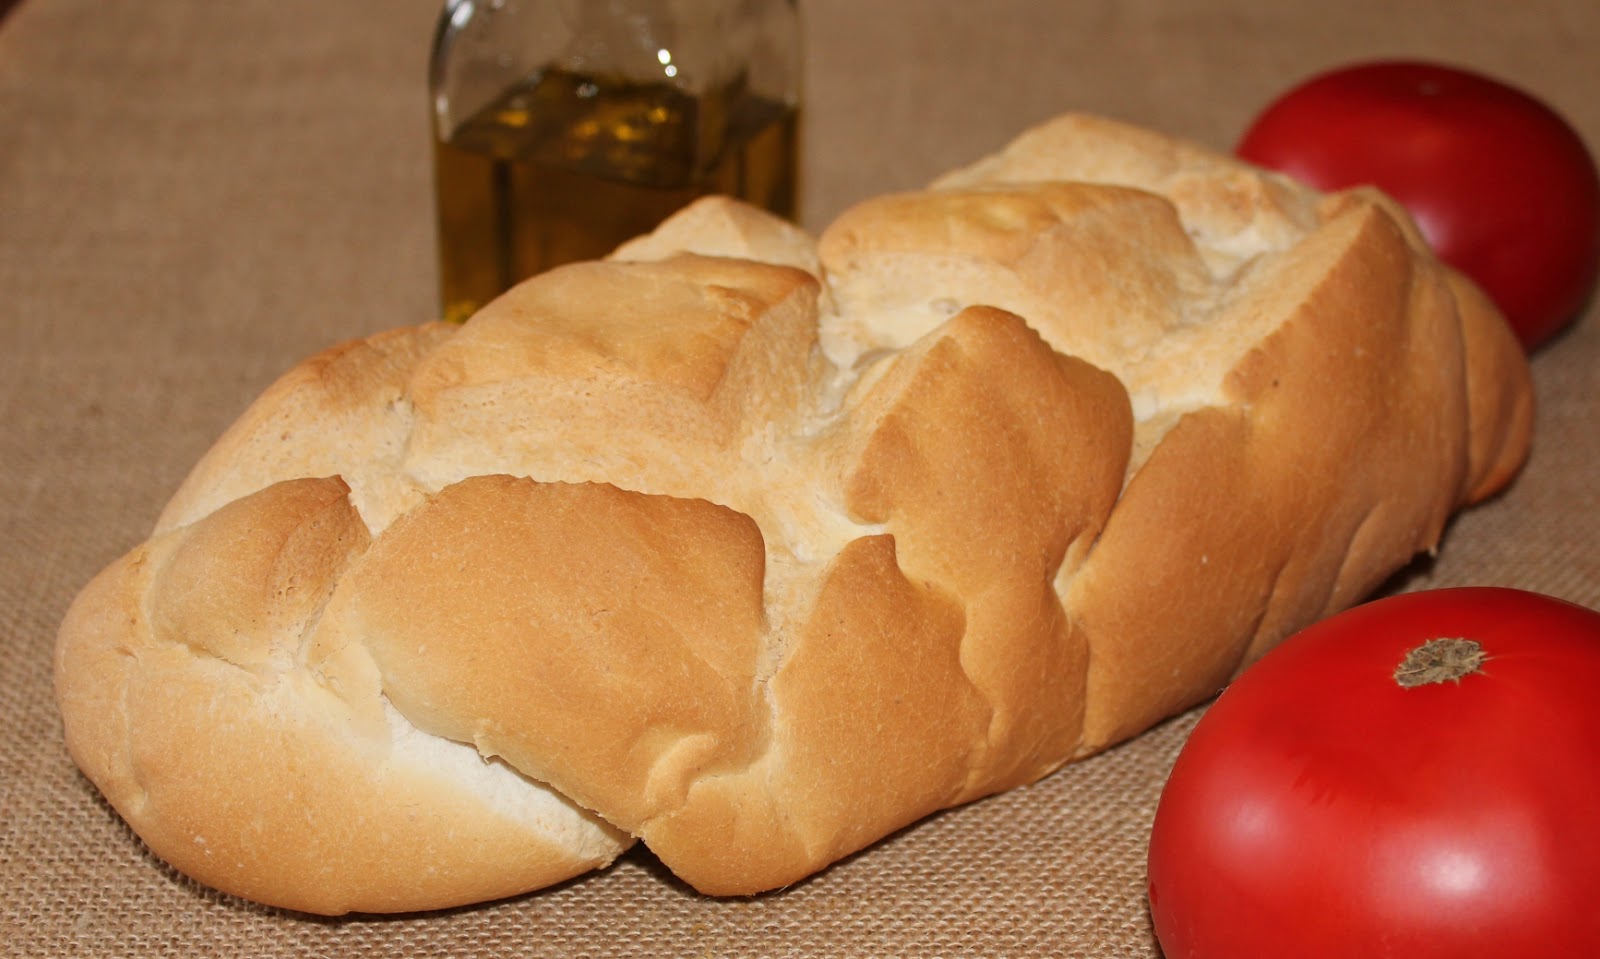 
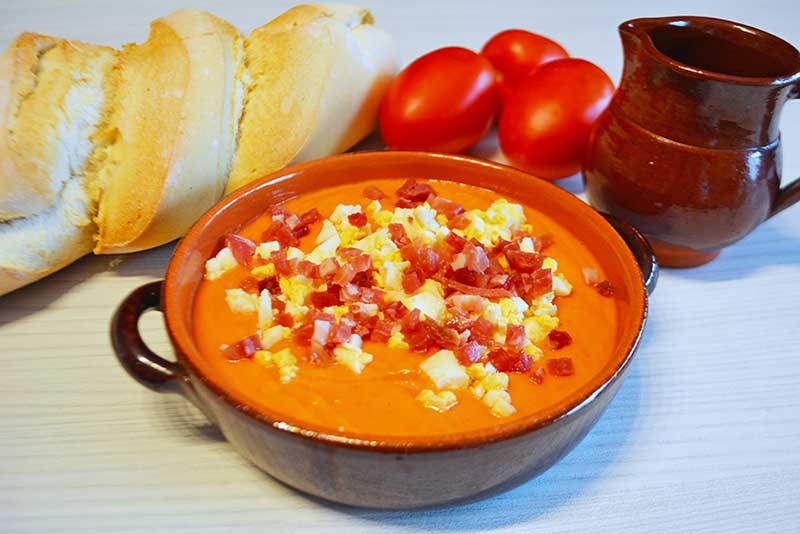
Wash, scald in boiling water and then place in cold water to separate the skin from the flesh of the tomato. Peel the tomatoes and blend them in a food blender, pass the liquidised tomato through a sieve to remove the seeds. Then pour it back into the blender and start blending again, while at the same time adding the garlic, then the bread, olive oil and salt until you have a homogenous mixture which is thicker much thicker than gazpacho, similar to a thick puree. Depending on the density of your bread dough you may need to add more or less, also the water content of your tomatoes will also influence the result so you may need to add more or less bread accordingly for whichever reason. Make sure you don't add all the bread at once, add it bit by bit and test for consistency as you go.
Finally, sprinkle chopped boiled egg and finely diced Serrano ham over the top and serve. Personally, I like to put my serrano ham in the microwave for 1 minute to crisp it up! It gives it that extra dimension and a little salty kick, which I love. It really is a simple, but delicious meal.
Enjoy!
1
Like
Published at 1:38 PM Comments (1)
It's Summer Time - Horchata!
Friday, July 4, 2025
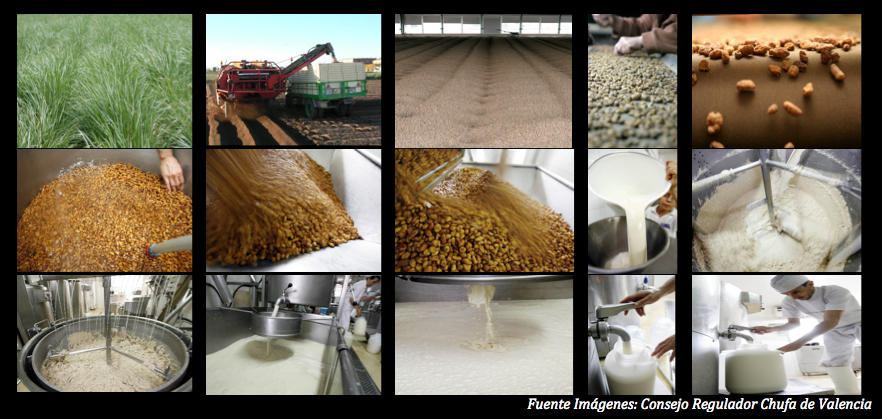
For those who are not so familiar with this summer refreshment, I thought I would share some of its history and how it is grown in and around Alboraya, next to Valencia.
It is made from chufa, which in English would be the tiger nut and as a drink it goes back thousands of years. Old civilizations such as the Egyptians left samples of this healthy product in their tombs and sarcophagi. Also, diverse Persian and Arab authors already mentioned in their writings the digestive benefits of the chufa. But it was in the 13th century when the Arabs introduced their crop in the Mediterranean area.
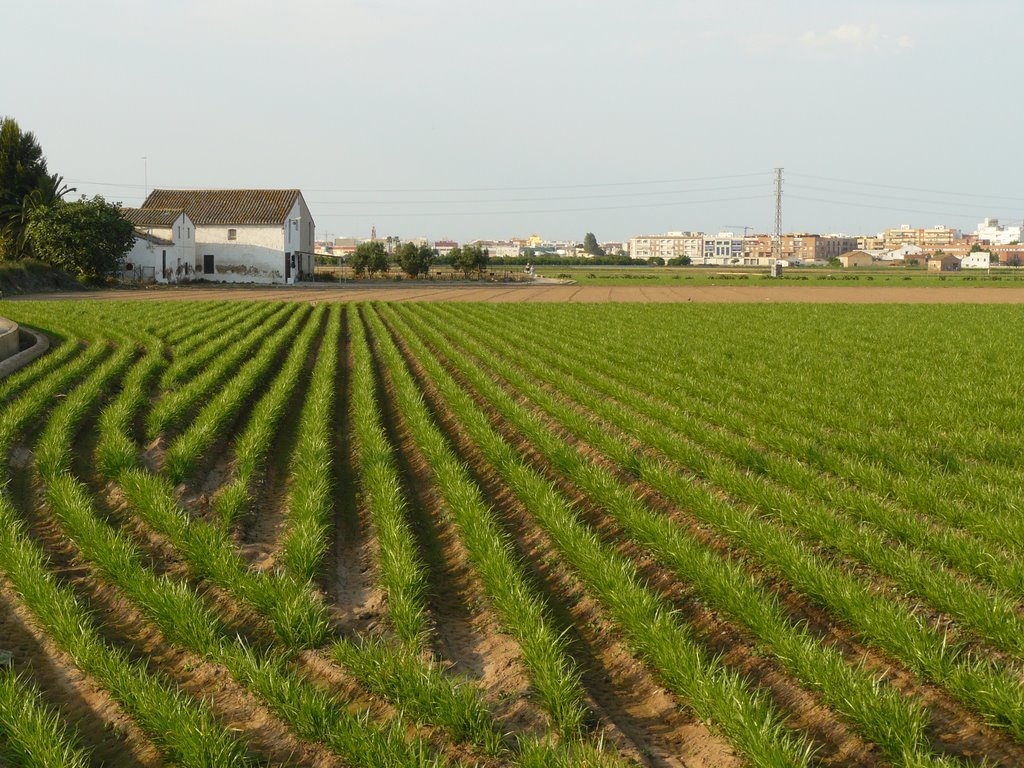
Valencia was and continues to be the only area in Europe where chufa is grown. Currently, it is farmed in 16 towns around the area known as L'Horta Nord (or the Northern fertile land), which surrounds Valencia.
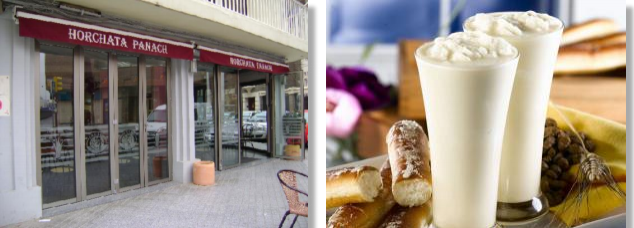
Alboraya is the world capital of Horchata and if you ever happen to be passing through Valencia I highly recommend you visit Horchateria Panach on the main road that runs through Alboraya. It is as good as it gets and also at an unbeatable price.
The chufa is cultivated in sixteen Valencian towns in the L'Horta Nord area, where a few specific climatic requirements combine and make it the only area of Spain where such a unique tuber is cultivated. About 5.3 million kilograms of tiger nut is produced in this area, of which 90% are covered by the Denomination of Origin.
The tiger nut from Valencia (Cyperus esculentus) is a herbaceous plant of around 40 to 50 centimetres in height. It has a rhizome radicular system from which some little roots grow and in the tips of these roots, the tiger nut is formed.
The chufa is sown from March until May, a date which is determined by the previous crop. Before the planting begins, a series of preparatory work is carried out, so that the soil remains spongy, loose and well levelled. The planting is carried out in a mechanical fashion, in ridges 20 cm high with 60 cm between them. The depth of the seed is from 4 to 5 cm. The depth of sowing is an important aspect since the yield and the quality of the tuber depend greatly on these measurements.
The harvest is carried out from November to January. Once the plant has completely withered and dried, it is burned and the ashes and remains are cleaned up. Then, it is sown again mechanically. A few weeks after the new planting, the tuber germinates. You shouldn't miss the opportunity to see the legendary irrigation ditches of Roman origin, improved and expanded by the Arabs throughout the area, which still remain.
Legend says that a young villager from the fertile area of Valencia known as L'Horta offered King Jaume I a white and sweet drink. The King, very pleased, asked; "Qué es això?" (What is this?), and the young woman answered, "Es llet de xufa" (It's tiger nut milk). The King, having tasted the drink replied, "Això no es llet, això és OR, XATA" - This is not milk, this is gold (=OR), pretty girl (=XATA)"
Legend or reality, the drink became famous throughout the country, adopting the name of Horchata de Chufa. This drink is a refreshing and essential product in the Mediterranean diet thanks to its innumerable and healthy benefits.
Known since antiquity as a source of vitamins and nutrients, the horchata is also considered a source of health and energy the world throughout. Along with its delicious and refreshing flavour, several medical studies have accredited its many beneficial properties for the body. Investigations have concluded that the horchata has great digestive properties thanks to its high level of amino acids and starch.
Several prestigious specialists from the University of Valencia have also determined that it is rich in minerals such as phosphorous, magnesium, potassium and iron as well as unsaturated fats and proteins. It is also recommended for all types of people, from the youngest to the oldest. The natural horchata can also be drunk by patients with a declared lack of tolerance to lactose and it is recommended for pregnant women as it includes more iron and potassium than a glass of milk.
It is an energising and nutritious drink that, thanks to its characteristics, has become part of the Mediterranean diet. Its cardiovascular properties are similar to those present in olive oil and it helps in reducing cholesterol and triglycerides as it has over 77% of oleic acid. All these characteristics make the Horchata of Chufa of Valencia a very complete and nutritious drink thanks to its macro and micronutrients. So be sure to try some the next time you are in Valencia this Summer. Enjoy!
4
Like
Published at 11:04 AM Comments (2)
Spam post or Abuse? Please let us know
|
|