It's not the first time I have written about cooking paella, but I think, if you are really interested in making paella this might just be the most useful article I have written. Since my last article, I have practised a fair bit and learned a significant amount through trial and error and testing other people’s recommendations.
I have learned one fundamental thing, always use the same size paella pan until you are consistently producing perfect paellas every time. That means understanding your pan-to-water-to-rice measurements, meat and vegetable quantities and heat control. All play a vital role in pulling off the perfect paella.
As I never managed to find any articles or anyone who ever really committed to the exact proportions or advice that was actually applicable in the home. You always needed to adjust for your situation ie. your pan was smaller or larger, your burner was less powerful, or you would never cook a paella that big ever and you would need to adjust everything!
Some would say 1 part rice to 3 parts water others would say 1 part rice to 2.5 parts water, 1 part rice to 4 parts water! ...and then you would need to make sure you are using the right variety of rice as each one absorbs more or less water. You see, so many things affect the result of a paella. What looks like is a simple dish is an absolute nightmare to get right! How much rice you put in the paella pan is key - the depth of the rice in the pan directly influences the amount of water (or stock if it is a seafood paella) and the cooking time so unless you have the same pan size and the same measurements etc your paella will never be the same. I have learnt a considerable amount over the years and I have come to the conclusion that the best-sized paella pan is 60 cm in diameter (unless you are consistently making paella for 9 -12 people at a time, in that case, it would be a 70cm pan.) But I think a 60 cm pan will serve the majority of households.
On the sticker of the 60 cm pan, it will say it is good for 20 servings. What this really means is that you can feed 20 people if you fill the pan to the brim with rice. But that is never done and should never be done as the rice is never cooked evenly when so deep. I have always had a wide range of paella pans in size at home, meaning I have kept changing pan sizes depending on numbers and I had never really mastered any one of them in particular. So fi you are serious about learning how to cook paella and to do it properly I suggest sticking to one size until you master it and adjust the amounts of rice accordingly. The bigger the pan the less influence the extra rice has on the cooking time. But if you go too big, controlling the heat and the even depth of the rice throughout the paella becomes an issue, but this tends to be the case when the pan is bigger than 100cm. Any bigger though and the quality of the paella is very difficult, if not impossible to, maintain at a high standard.
So, why 60cm? let me explain why this is an ideal size. Firstly, this size is ideal for 5 to 8 servings, but if necessary you can also stretch it to 10 on the odd occasion without the paella getting too deep. Secondly, it enables you to include sufficient amounts of meat and vegetables to obtain a decent stock and leave enough space for the rice, as the base of the pan measures 52,5cm in diameter. Most importantly, whether you make a paella for 5 or 8 people, your paella will never be more than 1 cm in depth. This is the key!
If you go to a restaurant your paella will always be thin, at most 1,5cm deep. This is fundamental if you want all the rice to be cooked evenly. The deeper the rice the more cooked it will at the bottom and possibly undercooked at the top As a maximum, you never really want to go any deeper than 2cm of rice. Ideally, aim for up to 1,5cm in the middle of the pan and up to 1 cm on the outer edge. Now you see why we need such a big pan for so few people. By doing this we will guarantee that the rice is cooked evenly and you will be able to control without too much trouble “el punto del arroz” - which is the equivalent of the “al dente” with pasta. If the rice is any deeper, this is realistically impossible, especially if you let the paella sit for a while before serving. As some varieties will continue to cook after being removed from the heat such as Senia - J Sendra, whereas other such as Bomba or Albufera will withstand the resting period before serving. If you don’t know the differences there are three main types of Valencian rice with the denomination of origin. They are as follows:
J.SENDRA ROUND RICE (from the Senia variety)
This rice originated in Valencia, cultivated in the Albufera under the seal of the Denomination of Origin Rice of  Valencia. Its grains have a great capacity to absorb the flavours and aromas from all the ingredients. It is the rice that is most used to make Valencian paella due to its creamier texture and ability to maintain its humidity on the surface without sticking. This creamier texture makes for a more intense transfer of flavours from the rice grain to the mouth. However, this variety takes no prisoners, or you get it right or your paella turns to a mushy nasty mess. The grain is prone to splitting if you cook it too long and it will continue to cook for about 2 to 4 minutes after turning off the heat. Something that you need to take into consideration. This is my prefered variety for paella.
Cooking time 13 - 15 minutes.
BOMBA RICE
This rice has a much higher amylose (a starch polymer) content than J Sendra. This means that the grain has a reduced surface humidity resulting in the grains not sticking during cooking. It also has a very high resistance to overcooking which is great for the novice and also restaurants that might have the paella waiting a short time before serving. The downside is that, although it does absorb a lot of stock, that transfer of flavour is not as high as with J Sendra due to the lack of surface humidity and the toughness of the grain. It lacks that creamier texture. It is a dryer paella compared to J Sendra. Personally, I prefer this variety for rice stews - “caldosos” as they are called here.
Optimum cooking: 16-18 min
ALBUFERA RICE
This rice is the result of crossing the Bomba and Senia/J Sendra varieties. It has an excellent capacity for absorbing flavours and aromas, close to J Sendra but with the resistance not so much to overcooking but to withstanding the resting time after cooking. So it does give some forgiveness with the cooking times.
Optimum cooking: 14-16 min
Now we have looked into the varieties, let’s continue...
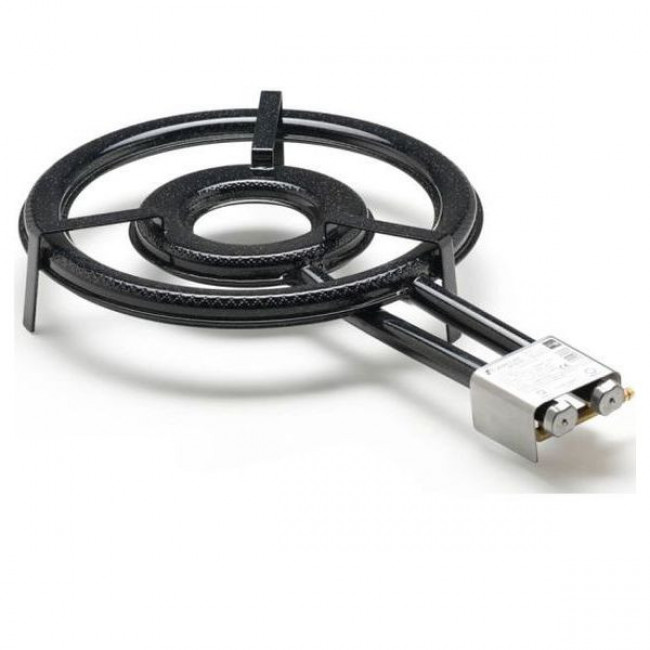
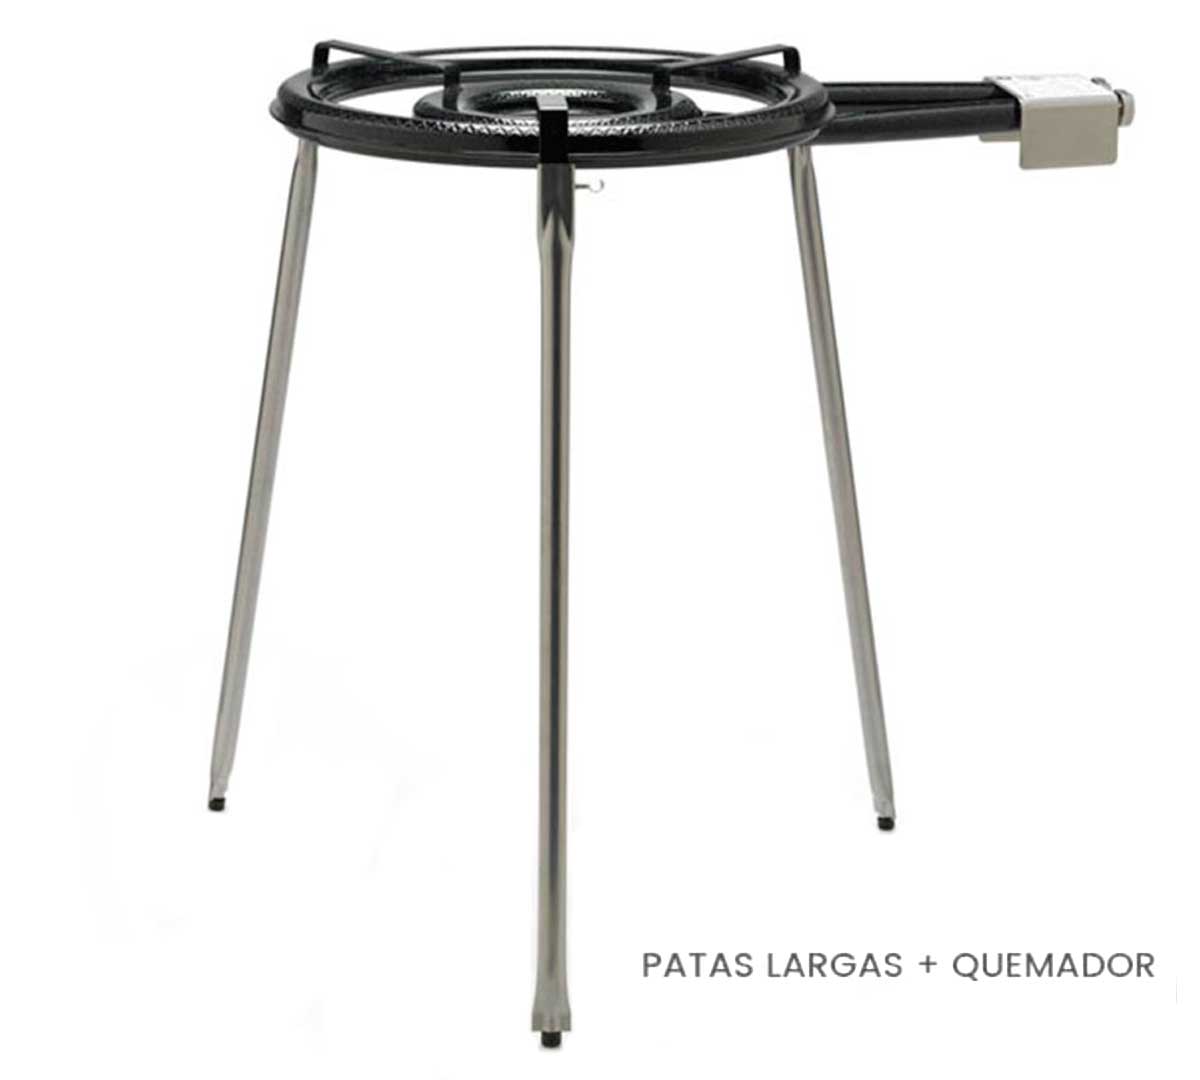
Recently, I just invested in a completely new set up for my paella cooking, which I am going to share with you. I bought a 60cm professional thickness paella pan - this means it will never warp and should become a family heirloom. Additionally, I bought a 46cm paella burner (alta gama) by Flames VLC with the gas attachment and adjustable legs. It all came to about €120 including postage, so pretty reasonable if you ask me. This setup will do you for life and will probably cover 95% of the paella requirements you will ever have.
I bought mine here - https://paellerosypaelleras.com/)
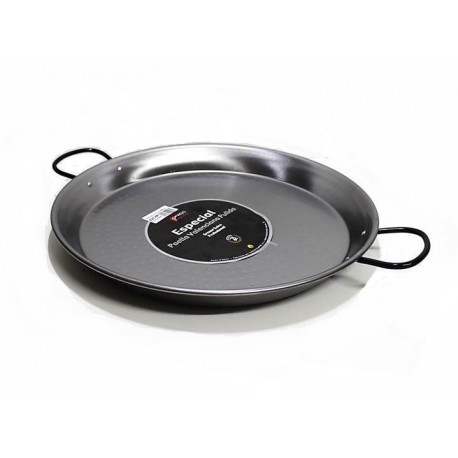
Allow me to share the measurements and instructions for this size pan, in case you decide to buy one.
For a 60cm pan, the minimum amount of rice would be 500g and I would say the maximum amount for a lovely thin paella would be 800g, but you could perfectly stretch it to 1kg if it was really necessary and it would still be fairly thin. I calculate 100g per person, which is a standard serving at any restaurant if you are serving starters. If you are not serving starters you might want to calculate 125g per person. So, even if you are two at home 500g is basically four healthy servings and it will keep in the fridge for a day without any problems. Realistically cooking any less at home is a bit pointless as the meat and vegetable quantities will be so small you won’t get a good stock. Anything between 500 and 800g is very similar to cook, you just adjust the water, but the cooking times are similar and with such a big pan it much easier to adjust accordingly.
The water ratio to rice for this pan and these amounts will be 4 to 1 : 4 parts water to 1 part rice. 400ml of water for every 100g of rice.
Why so much water compared to other recipes? Well, basically because the surface area of the paella pan is much larger than normal and therefore the capacity for evaporation is much greater. So much more water will evaporate than if the pan were smaller and the rice deeper.
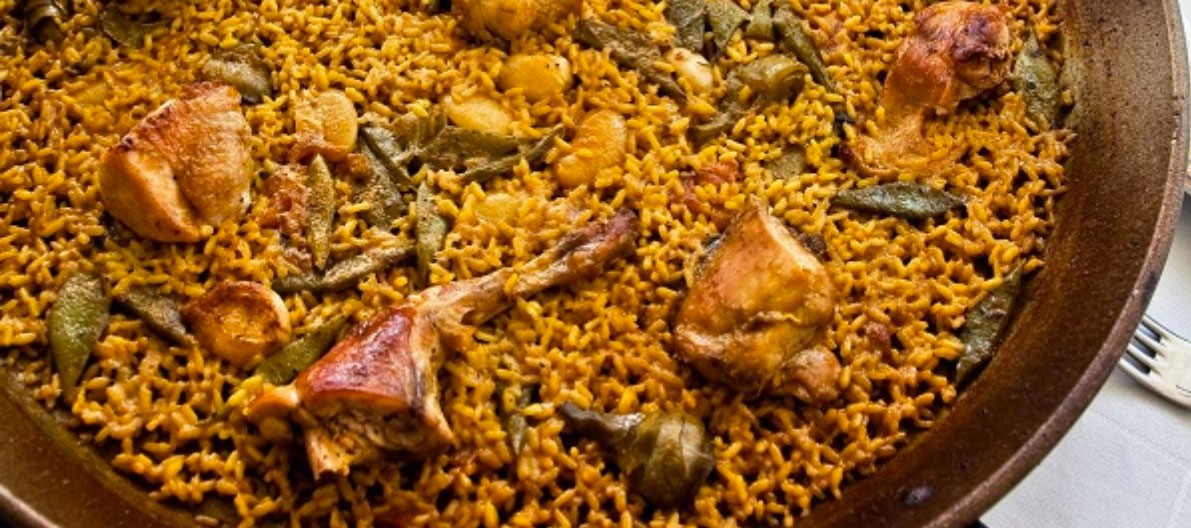
Let’s make it! - Valencian Paella
The authentic “Paella Valenciana” has it’s Denominación de origin, which identifies the 10 basic ingredients that it must have :
Olive Oil, Chicken, Rabbit, Ferraura (wide green beans), Garrafon (local large white butter bean), Tomato, Water, Salt, Saffron and Rice (Valencian round rice).
These are the basic ingredients for the orthodox paella, nothing else. However, some local variations are admitted under the name “Paella Valenciana”, which have come from local areas within Valencia, such as Benicarló where they historically add artichokes. Duck is used as well as other ingredients in the L’Albufera, snail, paprika and rosemary are also admitted but nothing else.
So here we go, I’m going to include artichokes, paprika and rosemary to the base recipe. remember we are using a 60cm pan and a 46cm gas burner.
-
500g rice variety - J Sendra (but you can choose which one you prefer)
-
800 g Chopped up chicken, including the liver.
-
500g Chopped up Rabbit,
-
400 g of Ferraura (also known as bajoqueta) large thick flat green beans.
-
200g of Garrofon – large white beans. Try to buy all the veg fresh not frozen.
-
200g Grated tomato (without the skin)
-
4 Artichokes – once cut up into 4 parts each, keep them in water with a little lemon, that way they won’t turn the paella a dark colour.
-
150ml Extra virgin olive oil (more or less)
-
Saffron threads
-
Table Salt
-
1 Dessert spoon of paprika (sweet)
-
Rosemary still on the branch if possible. I don’t recommend dried rosemary, it is easy to put too much in and ruin the paella. With the branch it is easy to remove it as soon as the right level of taste is acquired.
-
Water: 2 Litres + 1 Litre to create the stock - this will evaporate before we put the rice in.
Instructions
First make sure that the paella pan is perfectly horizontal, if it isn’t it won’t cook properly. You can test this by adding the olive oil to the pan and it should all stay in the centre. If it doesn’t adjust until it does. I also have a spirit level for this, a little quicker!
Turn on the gas to a medium heat.
Sprinkle some salt around the edge of the pan
When the oil is hot, add the chicken and the rabbit.
Fry the chicken and the rabbit for at least 20 minutes at medium to low heat. You don’t want it burnt but you do want it a deep rich golden brown colour on all sides. This is one of the main tricks behind a good paella. Most people do not cook the meat enough during the preparation stage. It will not end up tough, later with the water it will soften up the meat.
Once you have achieved the colour of the meat, spread out the meat to the edge of the pan to make room in the centre for the vegetables
Add the green beans first and fry them for about 5 minutes.
Then add the white beans and fry for a couple of minutes.
Spread the vegetables out to the edge of the meat and make room in the centre for the tomato.
Add the tomato and fry for about 3-4 minutes. Once all the water from the tomatoes has evaporated, add a little water back into the tomato (this is just a couple of tablespoons or so) and fry it again until it evaporates again completely. Do this three times and you will have a fantastic fried tomato. The little water you have added just to the tomato will evaporate completely so it is not contemplated in the water for the rice.
Leaving the tomato in the centre, we now add the paprika. Now, this is a critical point. We must have the water ready and at hand when we do this and move to a low heat. For about 30-45 seconds max. we cook the paprika with the tomato. If you cook it for too long it will make the paella bitter. The water will stop the paprika from cooking any further.
Now we add the water. Add ONLY the first measurement of 2 litres of water and take note where the water level has reached in the pan – I use a metallic ruler and simply place it in the middle of the pan and take a reading to the mm. Remember it and then add the extra litre of water.
Raise the heat to medium-to-high and start boiling the stock for at least 25 minutes.
If the water level reaches the first measurement of the 2 litres before time just add more water until the stock has a strong, rich and very slightly salty taste. The rice will absorb the salt. After about 20 minutes of boiling test for salt
Once we have a good stock flavour and have reached the first water level mark we add the rice. Just spread it out around the pan, as you have measured it is not necessary to do a cross or a line as many people do, these techniques come from judgement and practise and are basically pot luck and have to real sense to them. Just make sure all the rice is evenly distributed and all the grains are covered by the stock.
Add the saffron until we achieve a nice rich golden colour. Be careful not to put too much in, you don’t want an orange paella. What I do is take out two or three spoons of stock and pour them into a pestle and mortar with the saffron and then grind it all together and pour it back in.
After this point, we will not touch the rice or move it around.
Cook on high heat for 7 minutes, until the rice starts to appear through the stock.
Then drop to a low heat and cook for 5 minutes. It is important to drop the heat because we then avoid the burning of the starch that has come out of the rice and thickened the stock.
At this point add the rosemary branch. After about 3-4 minutes you can remove it, this is done by taste and smell. If it is becoming overpowering remove it straight away.
During the 5 minutes keep tasting the rice grains. By the end of the 5 minutes it should be slightly “al dente” but not hard. The last stage of the cooking will be done without the heat. The last minute or so, when there is now no stock left, you can raise the heat quickly to caramelize the bottom of the rice to the pan, but not burn it. It will go crispy with an intense flavour. This is called Socarrat. Use the back of a spoon to check that the rice is sticking to the pan, but smell it also to make sure you are not burning it. After a little practice, this will be easy, trust me.
We will not cook the rice for more than 12/13 minutes (Senia variety) unless we are not at sea level, as is Valencia. Altitude affects the cooking of rice; the higher up you are the longer it will take. So if you are up in the hills say 700m above sea level you will need a couple more minutes to cook the rice!
Remove from heat and let it sit for at least 5 minutes. The stock should have evaporated completely and this will complete the cooking process of the rice.
If the rice is still a little tough (you evaporated it too quickly) you can cover it with a damp kitchen cloth or tin foil while it is sitting for 5 minutes.
The rice should be roundish, in one piece, not broken or too sticky. You should be able to separate the grains easily, but they should also have a creamy texture.
Paella is often decorated with lemon quarters but honestly, it should just be decoration, the Valencians say "lemon is only used on a bad paella" ....to give it some flavour. So, NO lemon! and remember a traditional paella is best savoured using a wooden spoon, don't ask me why, but it is true. It just tastes better!
Get practising!