Beef Cuts in Spain
Tuesday, November 26, 2019
If you have ever felt completely lost at the meat counter in Spain, not knowing which cut is which and what you are actually buying, you are not alone. This is something that has bugged me for some time and I never really got round to working out the equivalents, firstly because some of the cuts are just different to the UK and secondly it was just really confusing. So I decided it was time to figure it out once and for all as I keep watching international cooking videos which keep making references to cut os meat in English and then I have the problem of sourcing them in Spain.
So, here goes, I have compiled a list of what I think are the most common cuts available in a Spanish supermarket and then a couple of diagrams to locate those less common cuts. Hope it helps! Please comment if you think I have made a mistake!
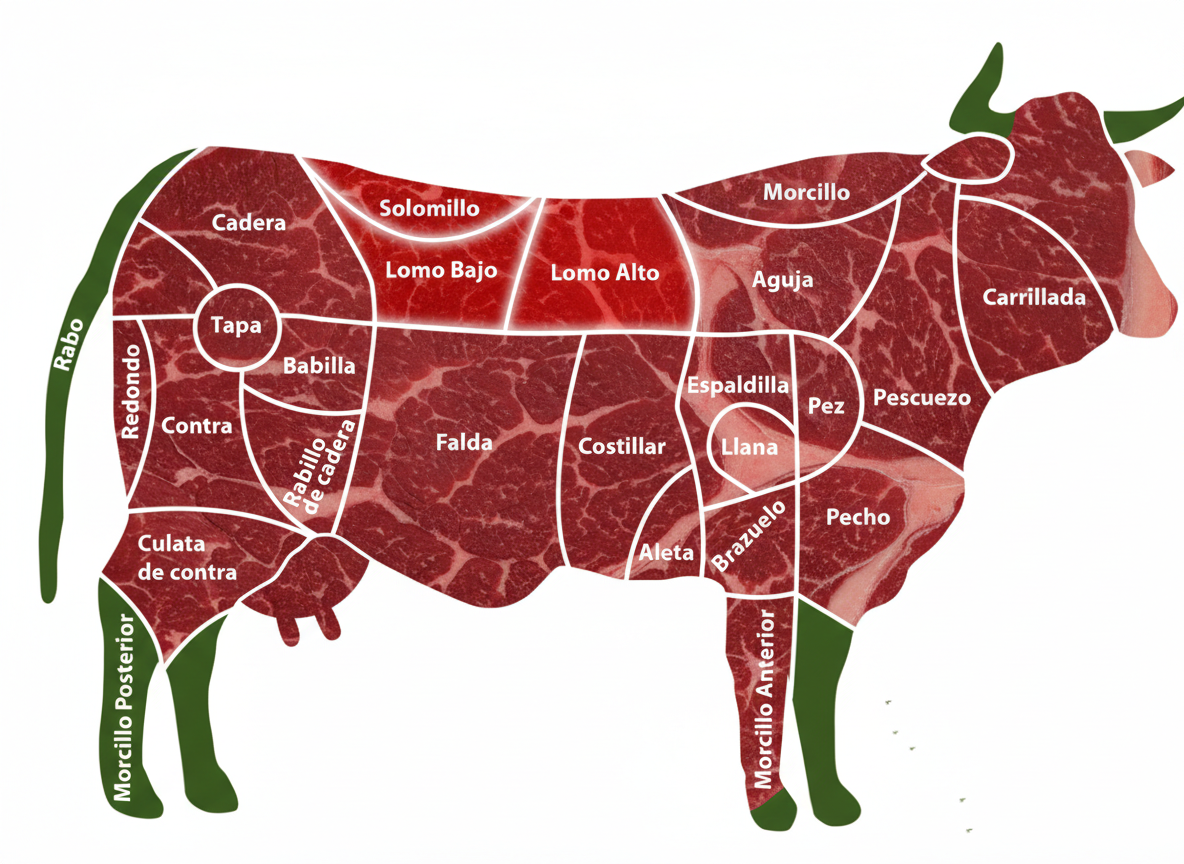
Common Cuts:
Solomillo: Fillet mignon – Tenderloin
Lomo Bajo: Sirloin - Striploin
Lomo alto: Prime rib
Chuletón: Rib roast/large end
Chuleta de lomo bajo con solomillo: T-Bone steak
Cadera: Rump
Babilla: Tail of Rump/Thick flank
Contra: Silverside
Redondo: Eye of Round
Aguja: Chuck
Pez: Chuck tender
Aleta: Bavette
Pecho: Brisket
Carrillada: Cheek
Costillar: Rib
Entraña: Thin Skirt
Falda: Flank
Pescuezo: Neck
Rabo: Oxtail/tail
Morcillo: Shank
Tapa: Topside
Categories by age:
·TERNERA (Heifer calves): male and female calves, younger than 12 months
·AÑOJO (Yearlings): calves between 12 and 24 months of age
·VACUNO MAYOR (Adult bovine): males and females older than 24 months
 0
Like
Published at 1:09 PM Comments (39)
0
Like
Published at 1:09 PM Comments (39)
Patatas Bravas - Potatoes and Madrid-Style 'Brava' sauce
Friday, November 22, 2019
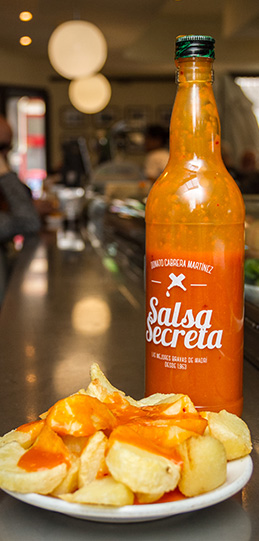 Patatas bravas is originally from Madrid, where it was created and then spread throughout the country. Now each region has made their own modifications such as in Valencia where they serve it with garlic mayonnaise and paprika pepper. But one of the most emblematic places to eat Bravas in Madrid with a traditional Brava sauce is Bar Docamar in Calle Alcalá 337. Its sauce is legendary in Madrid and a house secret. This bar goes through literally tons of potatoes every week and customers travel from all over Madrid to enjoy their Potato Bravas and buy their sauce. This classic tapas is basically potatoes cut into irregular chunks of approximately 3-4 cm, fried and dressed in a spicy sauce that is poured over them and served very hot. Patatas bravas is originally from Madrid, where it was created and then spread throughout the country. Now each region has made their own modifications such as in Valencia where they serve it with garlic mayonnaise and paprika pepper. But one of the most emblematic places to eat Bravas in Madrid with a traditional Brava sauce is Bar Docamar in Calle Alcalá 337. Its sauce is legendary in Madrid and a house secret. This bar goes through literally tons of potatoes every week and customers travel from all over Madrid to enjoy their Potato Bravas and buy their sauce. This classic tapas is basically potatoes cut into irregular chunks of approximately 3-4 cm, fried and dressed in a spicy sauce that is poured over them and served very hot.
When it comes to Patatas bravas' sauce there are two schools of thought: with tomato and without tomato. From my experience of living in Madrid and researching, I would say the more traditional Brava sauce without tomato. It is made with a base of extra virgin olive oil, sauteed onions, garlic, paprika and cayenne pepper, wheat flour and water or chicken stock. However other ingredients are used which are well-guarded secrets by each cook who adds a special something to the recipe.
In Catalonia, the sauce is made with olive oil, chilli, sweet paprika and vinegar. The important thing is that it's spicy, in fact, its name "bravas" makes allusion to this. In the Spanish language, bravo-a means brave or fierce if referring to an animal.
Patatas bravas are typically served in bars in many regions of Spain as tapas or "ración". It's considered one of the cheapest tapas due to its inexpensive ingredients. Should you ever visit Madrid, you'll absolutely have to taste patatas bravas and I highly recommend passing by Bar Docamar.
Here is my take on the 'Madrid' Patatas Bravas - Potatoes and Hot 'Brava' Sauce - Madrid Style
Ingredients - four portions:
4 large potatoes
1 large onion
3 garlic cloves
Pepper mix: 1 tsp of Paprika (normal) + 1 tsp of Paprika de la Vera (smoked) + 1 tsp of ground Cayenne pepper (hot) + 1tsp of white pepper
1,5 tbs of flour
1,5 tbs of sherry vinegar
Extra virgin olive oil
1 tsp salt
1 cup of chicken stock
Instructions:
1. Par-boil the potatoes. Cut the potatoes to size - uneven chunks of about 3 - 4 cms. Put the potatoes in a pot with water and bring to boil. Let them cook for about 10 minutes.
2. Dice the onion in fine chunks and chop the garlic
3. Heat three tbs of extra virgin olive oil and stir-fry the onion until its transparent.
4. When the onion is ready, add the garlic. When the garlic is browned, remove from the heat and add the pepper mix. Stir well so it mixes properly and put at low heat.
5. Add the flour and stir in well for about a minute. Be careful not to burn the paprika.
6. Add the cup chicken stock and cook for 10 minutes to make sure the flour and paprika are properly cooked.
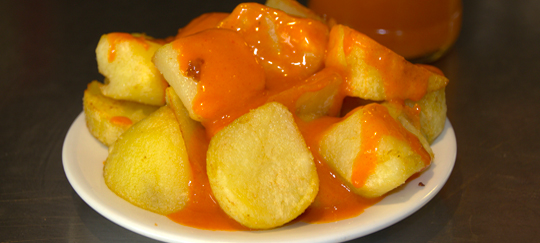
7. Add the salt and the sherry vinegar and cook for a further 5 minutes. If it is too thick just add a little more stock or if it is too liquidy just let if reduce further and cook for a little longer. It should be thick but not too thick. The photo should give you an idea of the consistency. But then again, choose the thickness you prefer.
8. Put the sauce in the mixer and blend until there are no lumps or use a hand blender.
9. In a frying pan heat abundant extra virgin olive oil (very important) and fry the potatoes on medium heat and then raise the heat for the last 2 minutes to crisp. Once they are lightly browned put the potatoes on absorbent paper so any excess oil is drained.
10. Put the potatoes in a large bowl and pour the desired amount of sauce.
Patatas bravas are simple and cheap to make, and best of all, you can add any spice or herb to your taste, Recipes all over the country are usually modified by each cook. A popular alternative is to add freshly grated tomato instead of chicken stock and flour. They are an excellent tapas and starter to any family meal so if you are thinking of holding a party or inviting friends over for dinner, why not make these for them!
Enjoy!
2
Like
Published at 9:25 AM Comments (5)
What do Olive Oil and Coffee have in common?
Tuesday, November 12, 2019
Coffee and olive oil in Spain have more in common than you might think and unfortunately not for the right reasons. Both are wonderful products and play such an important role in the Mediterranean lifestyle or diet: Olive oil for its health properties and culinary value and coffee for its social implications.
However, history and social circumstances have led to a general misunderstanding of what is actually good olive oil and what is good coffee and this lack of knowledge and false belief has lead a nation along for generations and only now are people starting to wake up to this misconception. Who would have thought that when a Spaniard working at an olive mill in his local village gave you a few litres of olive oil from the recent harvest, you would have probably received what is now referred to as just "olive oil" - not extra virgin. Certainly, the elder generations and those in their 40’s grew up with low-grade olive oil at home convinced they were consuming the nectar from the sun-blasted olive groves of their precious homeland. But this is through no fault of their own, technology available then was unable to prevent the contamination of residues left on the millstones and knowledge around the needs of the olive tree were no way near as advanced as they are today. So people all over the Mediterranean got used to what they believed was top-quality olive oil but this is one example where technology has actually helped us obtain the best from nature and traditional methods are in fact detrimental to the quality. Nowadays all olives are blended into a pulp and centrifuged not crushed with millstones and then pressed through mats, or at least they should be.
These classical traditional techniques that some customers find enchanting and some brands use as a marketing pull are actually a warning sign that you should probably stay well clear of them. It is impossible to achieve the same quality in a “traditional mill” when compared to a modern mill. But what this has created is a palate for poor quality. So what tastes "good" because it is all they know is actually bad olive oil. So much so that many producers centre on this palate of tastes to ensure their sales even though they are capable of producing better quality oils and unfortunately still today the majority of olive oils in supermarkets are of poor quality, especially in the UK. Some regions deliberately produce oil from frozen olives, as it is the local taste that they have become used to over the years. Naturally, the taste is awful for those who know good olive oil. So what we end up with is a leading nation in olive oil production that doesn’t really understand what good olive oil is, or better said if given a bad olive oil would almost definitely say it was good, really anyone can appreciate a good olive oil once given the opportunity to taste it, the fruitiness speaks for itself.
I always have top-quality olive oil at home and when friends and family come round for a meal they will always be served it. Once they smell it and taste it they are always blown away; "wow! It smells so good, what’s in it?” they ask, thinking that it carried some fruit additive or infusion and the simple answer is nothing, it should always smell like that…fruit juice. It should not smell like oil, you should instantly know this came from a fruit. So only time will educate the people as to what real olive oil should taste and smell like and that will be no easy task with bulk producers more interested in making the extra penny, but this is where regulations and quality controls should be stricter. So learn more about olive oil and how you can recognise a real extra virgin.

Coffee has a similar story. What is known in Spain and other countries as café torrefacto or Café Torrado is a coffee, which has received special toasting, special because it is different, not because it is better. Back in the 40’s there was a huge shortage in coffee and it was extremely expensive so substitute drinks started to appear in households around the country such as chicory root or cereal seeds toasted with sugar and their consumption became widespread. This same technique of toasting with sugar was applied to coffee too as it was believed that the coffee maintained its freshness for longer as the fine coating of sugar was thought by some to delay the aroma escaping from the bean and the oxygen entering the bean, as modern techniques of preservation were obviously not available. But the fact that sugar was involved in the process helped tremendously with its success after many years of sugared chicory root.
But what was this process of Torrefacto and what results did it achieve?
Well, a coffee bean acquires its taste and aroma during the toasting process, with Torrefacto café, sugar is added to the beans. In the past up to 20% of the volume but now it is regulated at a maximum of 15%. This sugar is added in the last stage of the toasting process as the temperature is at its highest, approximately 200ºC, the sugar caramelises and forms a shiny film around the coffee bean. The only thing this achieves is a darker coffee in colour and more bitter in taste. The carbonised sugar masks the majority of the coffee's qualities in terms of taste and aroma thus the technique was only really justified when the coffee bean was of very poor quality as the technique provides a certain uniformity and balance to the taste. However, nowadays its consumption is not recommended and it is considered harmful to one’s health.
Firstly because it is much harder for the digestive system to cope with and thus people with ulcers or stomach problems will have difficulty consuming this coffee but more importantly it has been banned in many countries around the world, as it is believed to be carcinogenic. This technique is only known or used in Spain, Argentina, Costa Rica, Bolivia, Mexico, France and Portugal. In the rest of the world, it is unheard of.
Although its use and consumption were perfectly understandable in those days it became a habit and the norm within Spanish society and continued even when economic conditions had improved. When the coffee sector was opened up in 1980, controlled up to then only by the state, laws changed and a new market was made available for large companies to tap into. Although they were unaware in those days, they took advantage of the widespread torrefacto coffee, which was approved by the state, cheap, balanced and well accepted by the Spanish consumers and started to mass-produce it. This not only convinced the public that coffee should be strong and bitter but it also promoted the habit of adding more milk to the coffee to make it more acceptable and logically limited the size of the servings.
Slowly but surely 100% natural coffee started to make its way in but initially only by means of blends, at first 80% torrefacto -20% natural. As time moved on these percentages started to change but there is still a long road ahead before the Spanish really start to appreciate 100% natural coffee. Today we can still see manufacturers offering especially to bars and restaurants 50/50 blends. However, in the north of Spain it is now far more common to find 100% natural coffee and the further north we go less torrefacto you will find. On the other hand in Andalucía you will find 60/40 (natural/torrefacto) and 50/50 and even in some villages you can still find 100% torrefacto, which is quite incredible nowadays and shouldn’t be allowed quite frankly.
So, in conclusion, please make sure your olive oil is fruity and your coffee is 100% natural, your body and your palate will thank you for it.
3
Like
Published at 5:43 PM Comments (6)
Really Easy Fideua! - Seafood Paella with Pasta
Thursday, November 7, 2019
Making paella can be a daunting challenge for many, getting the proportion of water to rice right so it doesn’t stick and go soggy, managing to get an intense flavour and so on, but for others it can be just an impossible task because they can’t find the Valencian round rice if they live abroad and you can’t make a paella with any other rice and achieve a good result. So here is the solution - Fideua
Fideuá is a very typical Valencian dish made with seafood and pasta, and pasta is so much easier than rice! Anyone can cook pasta. So our only real challenge here is getting an intense flavour, which is really quite simple if you follow a couple of my tricks - tricks I learned from experts, I may add. So how do we make it?
Like any paella dish, the key is in the stock, the secret is to make a good fish and seafood stock which isn't difficult but it can be a hassle and this post is titled "Easy Fideua" so we are going to cheat in this area by using a ready-made seafood stock, and with a little help we will make a really tasty fideua with as little effort as possible. Trust me, if you don't tell anyone, they will never know! It's also great as you can have all the ingredients at home in the freezer and the cupboard anytime, always a great meal up your sleeve in case of a surprise visit!
So this is what you'll need:
Here are the ingredients you will need to make a Fideuá for 4 adults:
Fideuá:
I'm using a Paella Pan measuring 55 cm in diameter (48cm base), you can do it with a smaller one too, but I prefer to have the pasta spread out and not too thick. You get better results as you can evaporate the stock quicker due to the larger surface area, thus get a more intense flavour before the pasta is cooked.
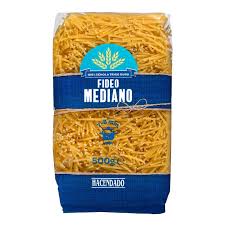
- 500g of short pasta - fideo medio here is an example :
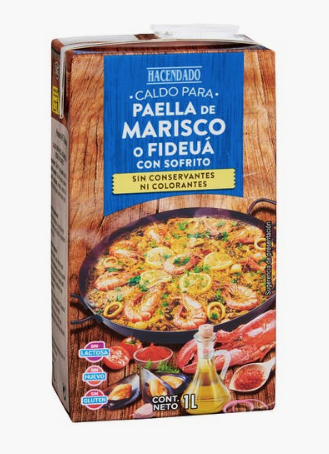
- 2 litres of Seafood Stock - ideally from Mercadona - (Caldo de Marisco para Paella y Fideua) - It has the highest concentration of seafood in it - more than other brands - ANETO is also very good, but more expensive.
- Extra virgin olive oil
- 3 pressed garlic cloves
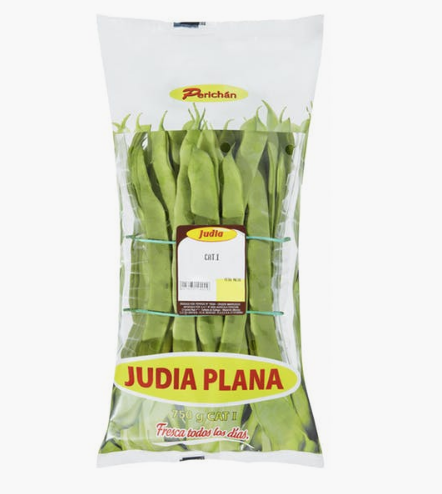
- 400g Flat green beans - Judias Planas - these are better fresh, but you can use the frozen ones too.
- 3 ripe plum tomatoes - grated with a cheese grater.
- 1 large brown onion finely diced
- 2 tsp of paprika powder - 'Pimenton dulce'
- A small pinch of Saffron - add this to the stock as it is heating up.
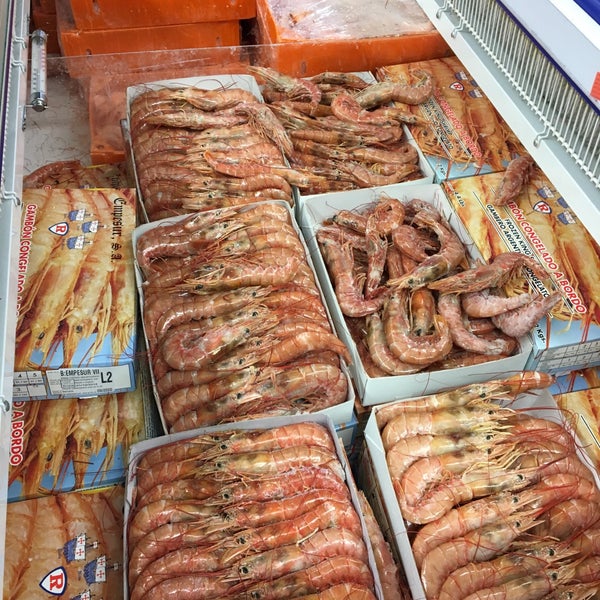
- 8 large uncooked king size prawns - "Gambon" - you can buy them frozen in Mercadona. These will cost about €3,5 euros at the most - defrost before cooking. This is what they look like in Mercadona:
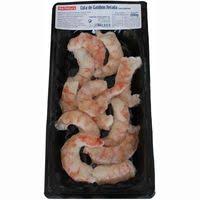
- 200 g Peeled King Prawn tails - Frozen - in Mercadona - defrost before cooking
You can add more seafood if you want, but trust me, this is enough.
• TIP: If you don’t like bits in your food remove the tentacles and the legs from the prawns before cooking them otherwise you will be picking them out of your Fideuá while you eat, as they fall off when you cook them.
Preparing the Fideuá:
- Heat the stock and keep it warm until you need it - add the saffron to the stock
- Add the olive oil to the paella pan - if it is level it will form a circle in the middle - keep adding until it is about a hands width from the edge of the pan about 11-12 cm
- Heat the pan - if you are using a paella burner, just use just the centre gas ring at this stage.
- When the oil is hot - not smoking - add all the prawns. Gently fry them on both sides for a few minutes. Remove the peeled prawns once they have changed colour and put to one side
- Squash the heads of all the king prawns so they release their juice. Make sure it has all come out - this is key to a getting a good result.
- Remove the king prawns and put to one side.
- Add the green beans (chopped into approx 1-2 inch pieces) and saute the beans in the oil until they are starting to go soft and browned slightly - then push them out the edge of the pan.
- Add the onions to the oil and gently fry them until they go transparent and slightly browned. Take your time, the slower they cook the more intense the flavour will be.
- Push the onions to the outer edge of the paella pan with the beans so they won't cook any further.
- Add the grated tomato to the centre of the pan and fry it. You can raise the heat a little - we want to evaporate the water from the tomato.
- TIP - Once the water has evaporated from the tomato and we just have pulp add a little water to the tomato pulp and repeat the process. Do this a minimum of three times. This will help get a really intense fried tomato. During the second evaporation add the crushed garlic to the tomato pulp and during the last evaporation add the paprika to the tomato and garlic pulp.
- Once the last evaporation is complete add all the pasta to the pan and fry the pasta in with the onions and the tomato. Do this for a minute or so and then add a couple of ladles of hot stock - make sure the stock is hot before you add it to the paella pan and the all the gas rings have been turned on and on medium heat.
- Spread the pasta out evenly across the pan and make sure you have enough stock in the pan to reach the edges and so that all the pasta is in stock - but not being totally covered by it.
- We will be adding the stock little by little to ensure we don't overcook the pasta. Our aim is to use all the stock - 2 litres - so at the beginning, you will want a high heat to evaporate the stock quickly before it cooks all the pasta - this way the flavours will be more intense - the more stock evaporated, the stronger the flavour.
- Keep adding the stock and evaporating until you feel you can add all of what is left - make sure that the past is not sticking to the bottom of the pan yet - if it is, it is too hot. We want that to happen towards the end.
- If you notice the pasta is almost cooked, place the king prawns and the peeled prawns back into the paella pan in a decorative circle, crank up the heat to evaporate the remaining stock quickly - this will be a bit of trial and error until you work out your temperatures with the burner - but its not difficult.
- When all the stock has evaporated lower the heat and let it toast the bottom of the pasta be careful not to burn it. You can test this with a fork. Stick a fork in and touch the bottom of the pan push back and forth gently to see if the past moves - if it doesn't it is toasting and creating a delicious crust.
- Once a crust has been made across all of the pan turn off the gas. Make sure you don’t burn it - keep smelling it - you will smell the pasta burning if you have gone too far.
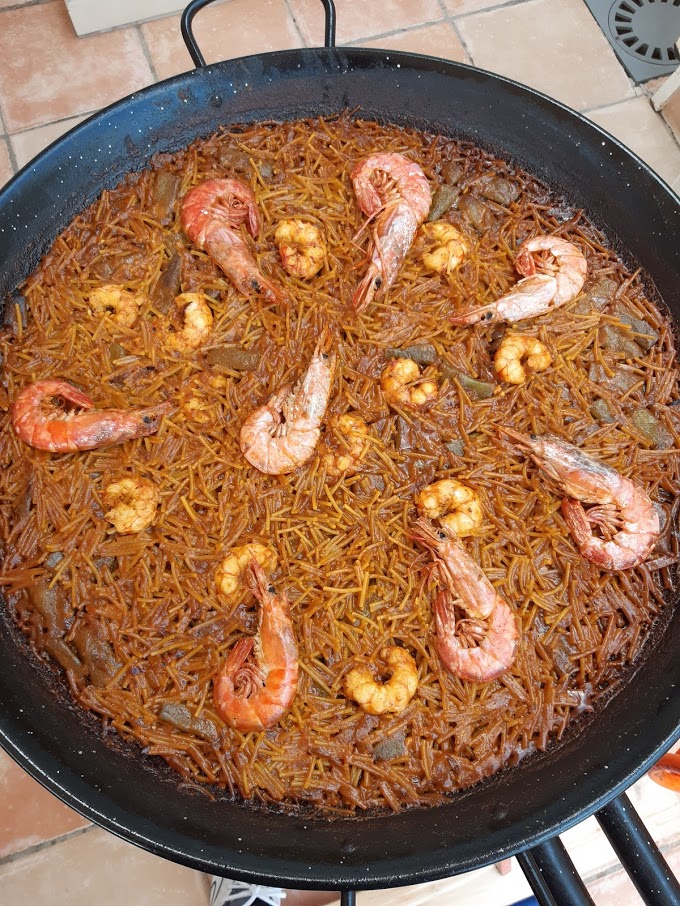
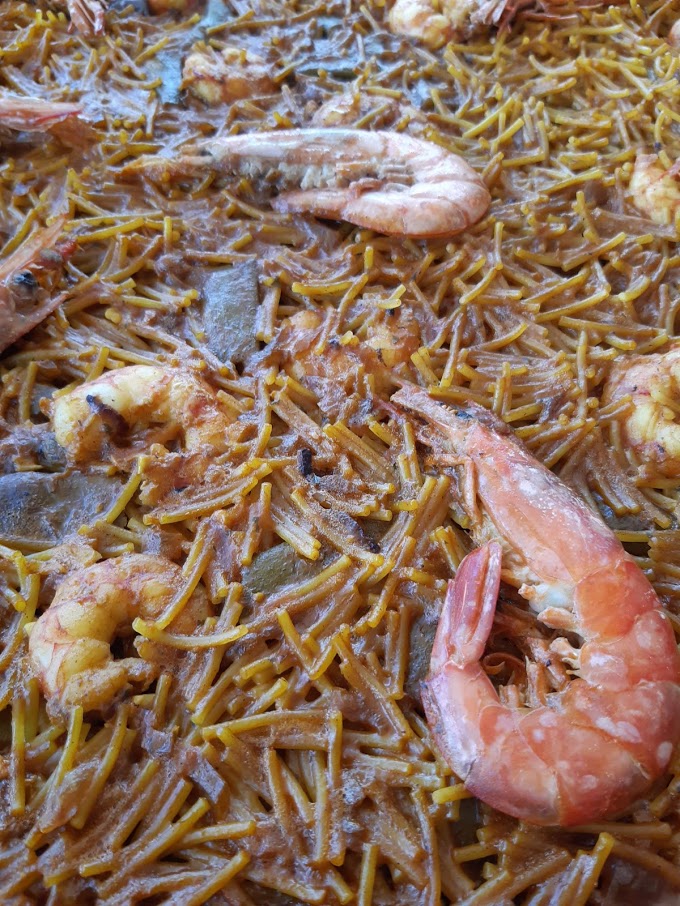
All that is left to now is let it sit for a few minutes and serve!
Hopefully, it will look something like this... Enjoy!
1
Like
Published at 11:55 AM Comments (4)
Spam post or Abuse? Please let us know
|
|