This is one beach you need to visit...
Friday, June 26, 2026
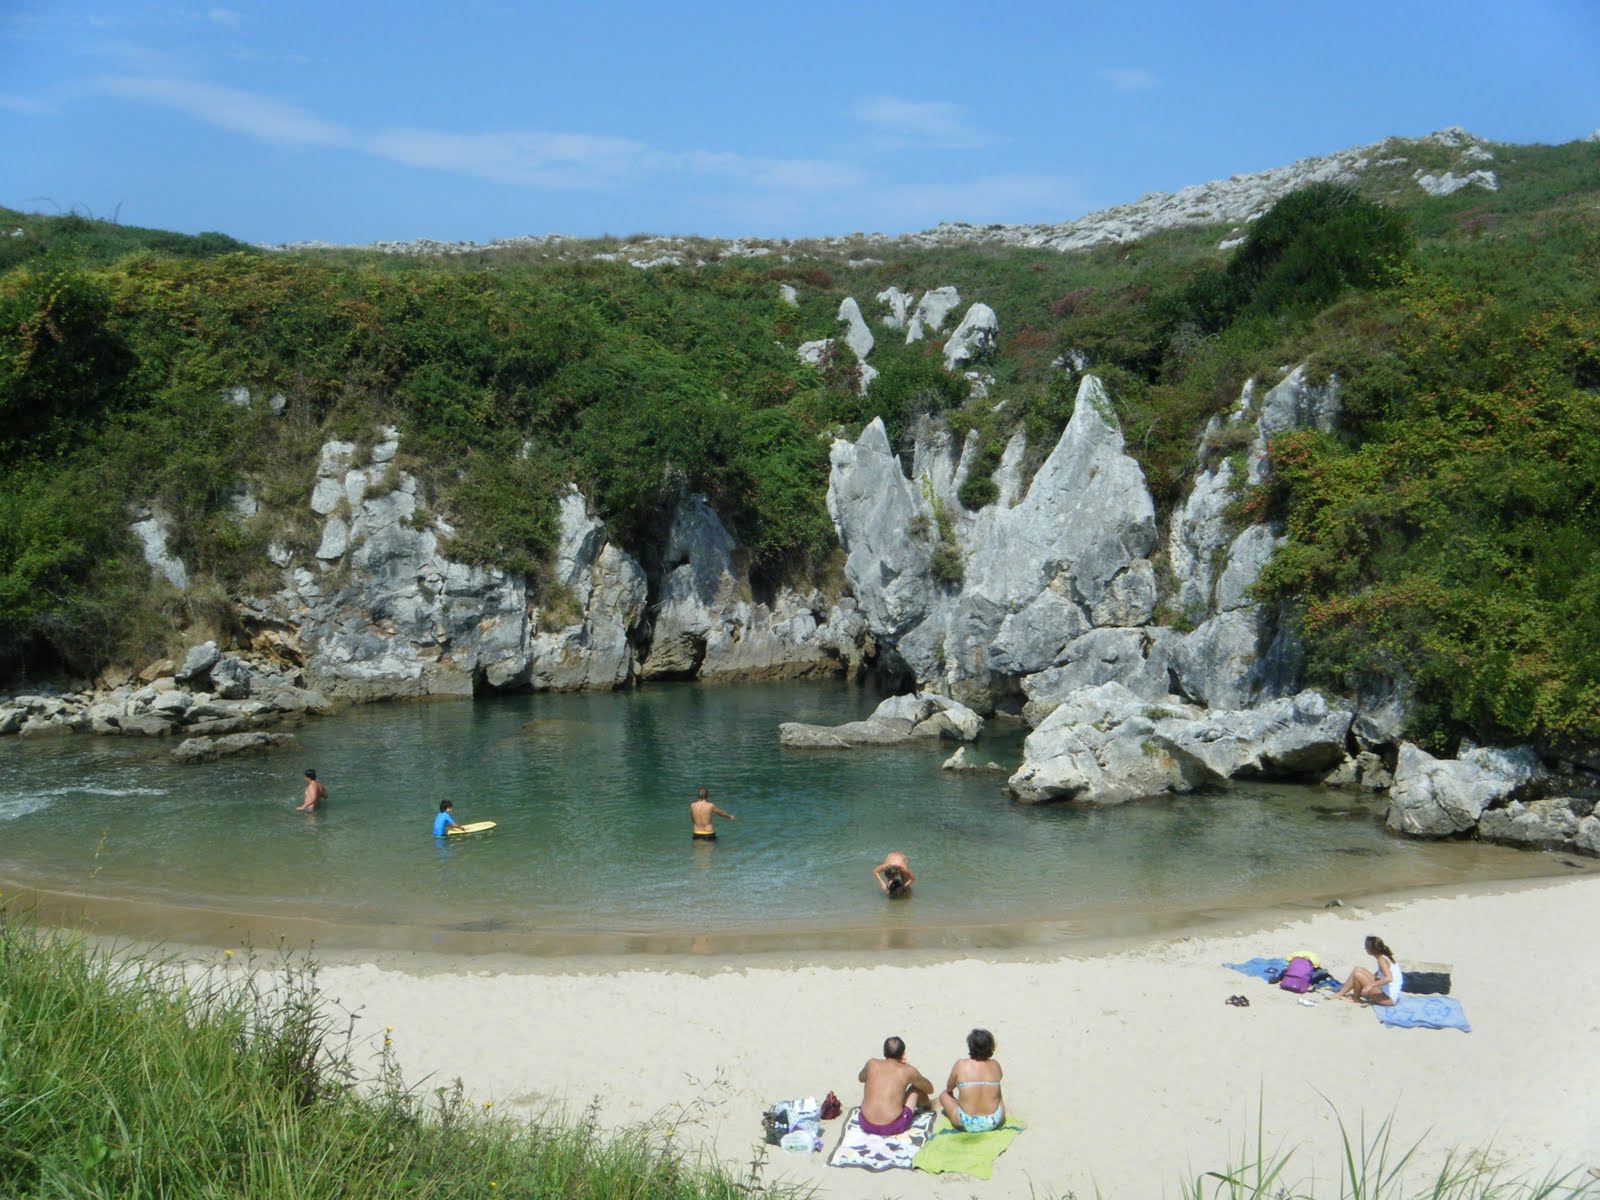
Playa de Gulpiyuri is one of the most amazing beaches in the world and also one of the most unusual and unique beaches you will find. This beach is certainly on my agenda for my next visit to Asturias. Recommended by a friend, this beach is a jewel and I thought I would share it with you all in case you plan to pass through Asturias one day.
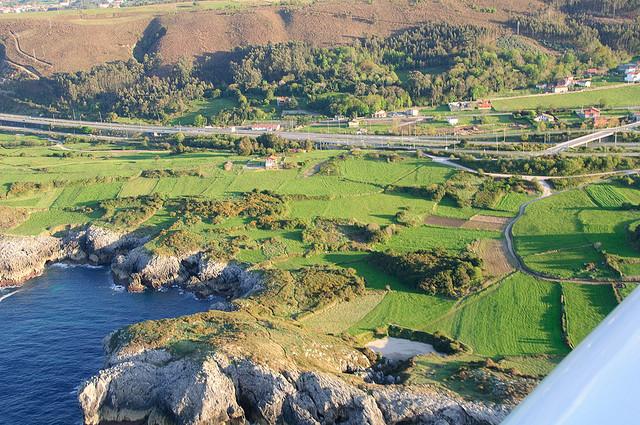
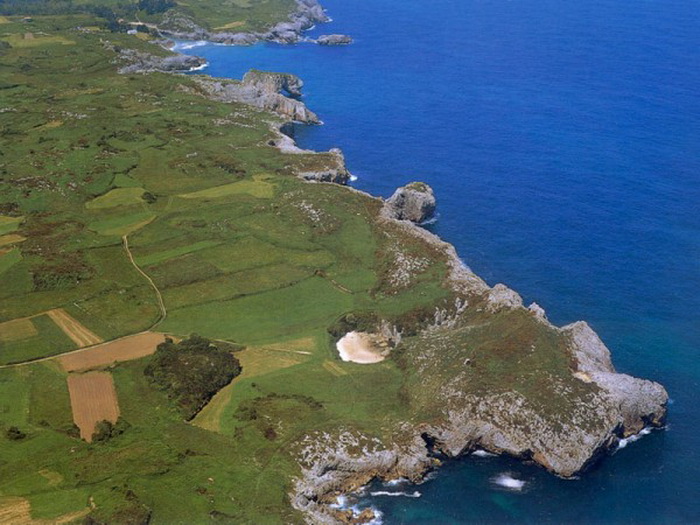
It is located near the coastal town of Llanes, on the coast of Asturias, Gulpiyuri Beach is unlike anything I have ever seen, or even imagined existed outside of Dali painting or a fantasy film. Imagine walking through the country and stumbling over an idyllic beach right in the middle of a green meadow and 100m from a cliff face. However, while you may find other beaches completely hidden from the open sea, around the world, this one is actually fully tidal and even has waves bathing the small strip of golden sand.
So how on earth did this beach come about? It appears the salt waters of the Cantabrian Sea bored through the cliffs, creating a series of underground tunnels and caves that constantly feed water to Gulpiyuri Beach. The beach originally was a cave that collapsed, creating an inland exit for the seawater which also carried sand with it and over time this gem was created. The water from the nearby Bay of Biscay comes in through the underground tunnel network and washes upon Gulpiyuri in gentle waves adding to the charm of this magical beach. The crystal clear water of this beach is irresistible, but you may find it a little cold, because the water tends to remain underground for a while, before washing up on the Beach. Because it’s only 50 meters in length it isn't very big, but it's big enough to enjoy it and small enough to be secluded and hard to find. If you don't have a GPS you'll need help from the locals to get there.

Ver mapa más grande
 2
Like
Published at 6:33 PM Comments (2)
2
Like
Published at 6:33 PM Comments (2)
Horchata Time!
Friday, June 12, 2026
For those who are not so familiar with this summer refreshment, I thought I would share some of its history and how it is grown in and around Alboraya, next to Valencia.
It is made from chufa, which in English would be the tiger nut and as a drink it goes back thousands of years. Old civilizations such as the Egyptians left samples of this healthy product in their tombs and sarcophagi. Also, diverse Persian and Arab authors already mentioned in their writings the digestive benefits of the chufa. But it was in the 13th century when the Arabs introduced their crop in the Mediterranean area.
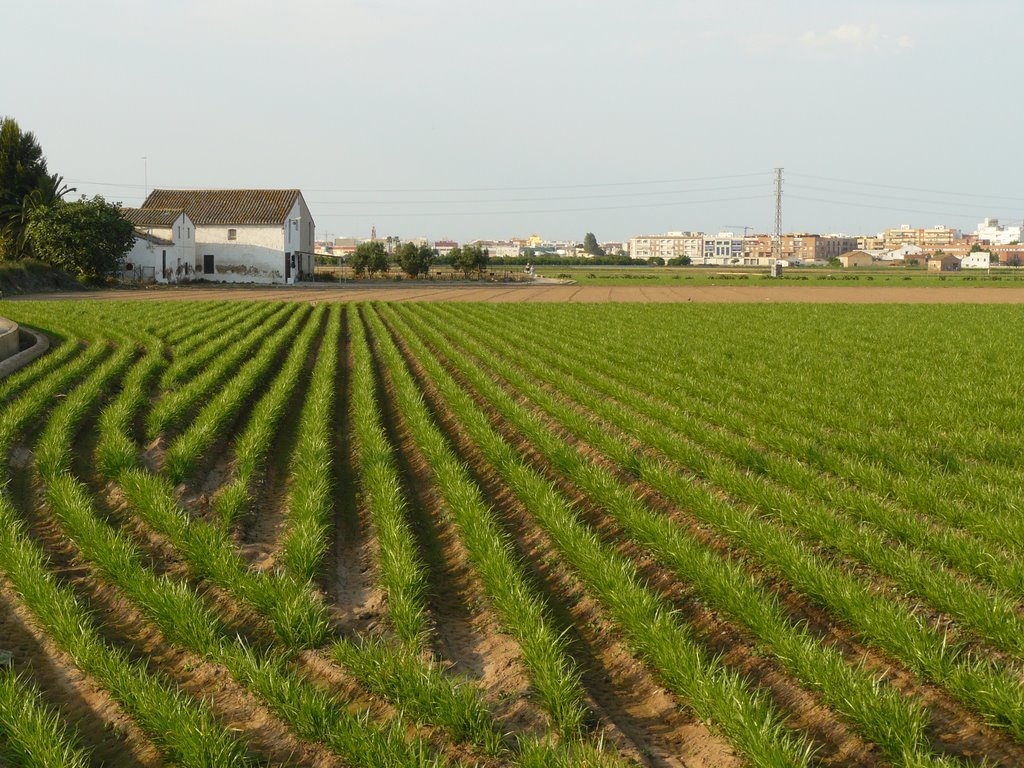
Valencia was and continues to be the only area in Europe where chufa is grown. Currently, it is farmed in 16 towns around the area known as L'Horta Nord (or the Northern fertile land), which surrounds Valencia.
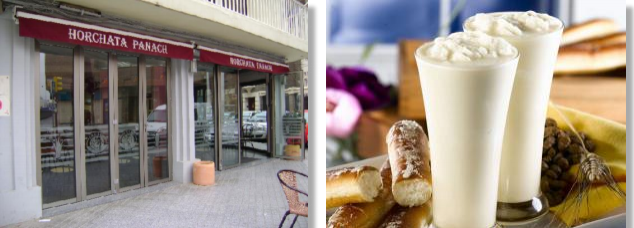
Alboraya is the world capital of Horchata and if you ever happen to be passing through Valencia I highly recommend you visit Horchateria Panach on the main road that runs through Alboraya. It is as good as it gets and also at an unbeatable price.
The chufa is cultivated in sixteen Valencian towns in the L'Horta Nord area, where a few specific climatic requirements combine and make it the only area of Spain where such a unique tuber is cultivated. About 5.3 million kilograms of tiger nut is produced in this area, of which 90% are covered by the Denomination of Origin.
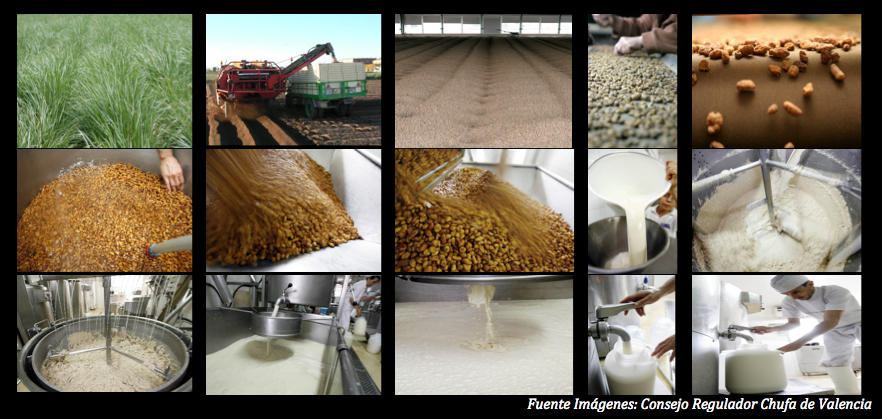
The tiger nut from Valencia (Cyperus esculentus) is a herbaceous plant of around 40 to 50 centimetres in height. It has a rhizome radicular system from which some little roots grow and in the tips of these roots, the tiger nut is formed.
The chufa is sown from March until May, a date which is determined by the previous crop. Before the planting begins, a series of preparatory work is carried out, so that the soil remains spongy, loose and well levelled. The planting is carried out in a mechanical fashion, in ridges 20 cm high with 60 cm between them. The depth of the seed is from 4 to 5 cm. The depth of sowing is an important aspect since the yield and the quality of the tuber depend greatly on these measurements.
The harvest is carried out from November to January. Once the plant has completely withered and dried, it is burned and the ashes and remains are cleaned up. Then, it is sown again mechanically. A few weeks after the new planting, the tuber germinates. You shouldn't miss the opportunity to see the legendary irrigation ditches of Roman origin, improved and expanded by the Arabs throughout the area, which still remain.
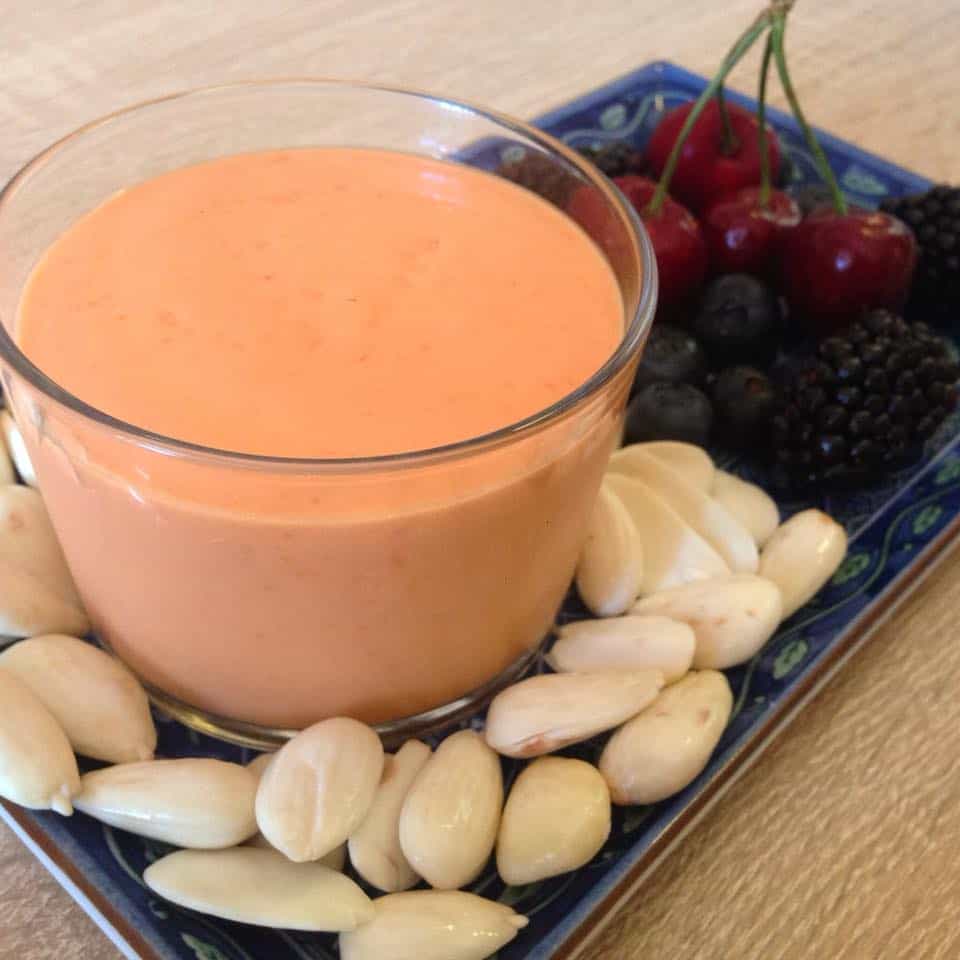
Legend says that a young villager from the fertile area of Valencia known as L'Horta offered King Jaume I a white and sweet drink. The King, very pleased, asked; "Qué es això?" (What is this?), and the young woman answered, "Es llet de xufa" (It's tiger nut milk). The King, having tasted the drink replied, "Això no es llet, això és OR, XATA" - This is not milk, this is gold (=OR), pretty girl (=XATA)"
Legend or reality, the drink became famous throughout the country, adopting the name of Horchata de Chufa. This drink is a refreshing and essential product in the Mediterranean diet thanks to its innumerable and healthy benefits.
Known since antiquity as a source of vitamins and nutrients, the horchata is also considered a source of health and energy the world throughout. Along with its delicious and refreshing flavour, several medical studies have accredited its many beneficial properties for the body. Investigations have concluded that the horchata has great digestive properties thanks to its high level of amino acids and starch.
Several prestigious specialists from the University of Valencia have also determined that it is rich in minerals such as phosphorous, magnesium, potassium and iron as well as unsaturated fats and proteins. It is also recommended for all types of people, from the youngest to the oldest. The natural horchata can also be drunk by patients with a declared lack of tolerance to lactose and it is recommended for pregnant women as it includes more iron and potassium than a glass of milk.
It is an energising and nutritious drink that, thanks to its characteristics, has become part of the Mediterranean diet. Its cardiovascular properties are similar to those present in olive oil and it helps in reducing cholesterol and triglycerides as it has over 77% of oleic acid. All these characteristics make the Horchata of Chufa of Valencia a very complete and nutritious drink thanks to its macro and micronutrients. So be sure to try some the next time you are in Valencia this Summer. Enjoy!
2
Like
Published at 10:27 PM Comments (3)
Premium Gazpacho - You'll never go back!
Friday, June 5, 2026
 With all my recipes I attempt to share the raw essence of Spanish cuisine, the simple basic recipes that have become the foundation of the Mediterranean diet. They are not necessarily flamboyant dishes and certainly don’t need expert hands to make them, but they have all passed the test of time and are still classics to this very day. With all my recipes I attempt to share the raw essence of Spanish cuisine, the simple basic recipes that have become the foundation of the Mediterranean diet. They are not necessarily flamboyant dishes and certainly don’t need expert hands to make them, but they have all passed the test of time and are still classics to this very day.
Almond Cream Gazpacho is similar to a normal Gazpacho but much more filling and creamier in texture more like a Salmorejo, personally, I prefer it and depending on how you prepare it can be a meal in its own right. Whereas with the original Gazpacho you would need a second course to accompany it. This recipe is basically a combination of the two, through trial an error, I finally found the consistency and flavour that was ideal for me. What I am going to share with you is not strictly a Gazpacho or a Salmorejo but a variation of the both and it is absolutely fantastic! My mouth is watering as I write! It’s an all-time favourite with all my family.
It is cheap, easy and quick to make and as it’s main ingredients are tomato and olive oil, so you can’t go wrong! Anyone who loves a salad will adore this recipe. All you need is a blender, a fine sieve and a pestle and mortar.
These are the ingredients you will need for 8 servings, as it keeps in the fridge for a couple of days I always tend to make more than I will need for one sitting.
For 8 servings
1 kilo of mature tomatoes, peeled and with the seeds removed
30 g of peeled almonds
2 cloves of garlic (removing the inner root so you don’t have that taste of garlic repeating all day!)
3 slices of stale country loaf bread, approx 300g from the day before (without the crust, not baguette)
100 ml of white wine vinegar
1 red pepper
1 green pepper
1 or 2 large spring onions or sweet onions (just the onion, not the Green sprouts, but the size of a normal onion)
1 cucumber ( about 20 cm)
150 ml extra virgin olive oil
10g Salt – or to taste
Toppings:
8 slices of Serrano Ham
8 boiled Eggs
Baguette Croutons fried in Extra Virgin Olive Oil
The first step is to scald the tomatoes in boiling water for a minute and then place them in cold water straight away and remove the skin. Then we dice up the bread and add the vinegar to the stale bread. Grind the almonds and the garlic cloves in the mortar. Once you have a paste add the bread and vinegar and keep grinding until they have all blended together nicely.
We remove the skin from the cucumber using a potato peeler and chop it up along with the tomatoes, spring onion and peppers. Now place all the ingredients in the blender all together along with the Extra Virgin Olive Oil. I use Arbequina variety olive oil for this recipe but really you can use any good extra virgin olive oil. Just make sure it isn’t too pungent. Blend them all together until you have an even mixture. Variations may occur depending on the type of bread you have used, so if it is not thick enough just add more bread to the recipe. If it has turned out too thick, you can correct the mixture with a little water. Salt to taste and then pass the entire mixture through the sieve to remove all the seeds from the tomatoes and the cucumbers.

At this point, the Almond Cream Gazpacho is finished. The mixture is certainly not written in stone, so some may prefer it with less vinegar or more vinegar, or more almond or fewer almonds. It is a question of finding your balance. All you need to do is adjust the proportions until you find your ideal flavour. The texture should be a like a thick creamy soup.
Next, we need to prepare the toppings. I place the Serrano ham in the microwave for approximately 1 minute until it is nice and crispy. Once out of the microwave, place the ham on a piece of kitchen paper so it cools down and soaks up the fat that has been released. We don’t want that fat in the gazpacho.
This is not traditionally Spanish, but I’m not so keen on chewing cured ham in my soup, I prefer that on its own with a bit of cheese and wine. So now we chop up the crispy ham and the boiled eggs and put them to one side.
Finally the croutons, you cut up a baguette into small pieces including the crust. Get a frying pan and pour in a healthy amount of extra virgin olive oil. Heat up the olive oil and make sure it is hot before putting the bread in that way the bread won’t soak up the oil but toast it almost instantly. It is very fast so be prepared to take them out quickly before they get too toasted. Let them cool down and dry on a piece of kitchen paper.
When it comes to serving, serve the Almond Cream Gazpacho in a bowl and sprinkle a chopped egg over the top, one chopped slice of crispy ham and a handful of croutons. Listo! Ready to eat.
ENJOY!
2
Like
Published at 6:16 PM Comments (0)
What Do You Rate Most Highly About Spain?
Friday, May 29, 2026
Every few years, it is worth stepping back from the daily stream of property market updates, tax changes, and bureaucratic hurdles to ask ourselves a fundamental question: Why did we choose Spain in the first place, and what keeps us here?
Looking back at past discussions on the Eye on Spain blogs, the core reasons people fall in love with this country rarely change. However, as we cross the mid-point of 2026, the way we live, work, and enjoy Spain has shifted. A country once loved purely for cheap beer and endless beaches has evolved into a sophisticated, modern haven that offers a completely re-engineered quality of life.
Whether you are a long-term expat, a "snowbird" navigating the post-Brexit landscape, or someone scrolling through property portals from a rainy kitchen in Northern Europe, here is what our community rates most highly about Spain today.
1. The Quality of Life & "The Great Outdoors"
The weather will always be the headline act—300+ days of sunshine a year is hard to beat. But in 2026, the appreciation for Spain's climate has transformed. It is no longer just about sitting by a pool; it is about an active, outdoor lifestyle.
From the world-class cycling infrastructure in the Valencia region to the beautifully maintained hiking trails of the sierras, Spain has become Europe’s playground for health and wellness. The ability to finish work or step out of retirement at 5:00 PM and comfortably play a round of golf, ride a bike on smooth tarmac, or walk along a blue-flag beach in the middle of November remains the ultimate luxury.
2. A World-Class, Modern Infrastructure
There was a time when moving to Spain meant accepting a "slower, slightly disconnected" way of life. That stereotype is officially dead.
Today, Spain boasts one of the most advanced digital infrastructures in the world, with high-speed fibre-optic internet reaching the most remote rural pueblos. This has turned the country into a global magnet for digital nomads and remote executives. Combine that with a high-speed rail network (AVE) that lets you travel across the country seamlessly without ever setting foot in an airport, and Spain offers a level of modern convenience that often outclasses that of the UK and North America.
3. The Unrivalled Healthcare System
Ask any expat who has had to use the Spanish healthcare system—either public or private—and they will likely tell you it is one of the country's greatest assets. Especially for retirees, the peace of mind that comes from clean, efficient hospitals, exceptionally well-trained medical staff, and remarkably low prescription costs is an absolute game-changer. In a post-pandemic world where health is everything, Spain’s medical infrastructure is a massive tick in the safety column.
4. A Culture That Prioritises Family and Connection
In Northern Europe, life often feels like it is built around work and consumerism. In Spain, the entire societal structure is built around human connection.
The concept of the plaza—where three generations sit together at 10:00 PM, children playing, parents talking, grandparents enjoying a glass of wine—is not a tourist cliché; it is a daily reality. There is a profound lack of loneliness here because the culture inherently draws you outside and into the community.
5. The Food Revolution (And It’s Still Great Value)
While global inflation has caused grocery bills to creep up slightly over the last year, Spain’s food scene remains a source of daily joy. The focus on fresh, seasonal, locally sourced ingredients means that even a simple €15 Menú del Día at a roadside Venta can be a culinary highlight. From municipal fresh food markets to world-class gastronomy, eating well in Spain isn't a luxury reserved for special occasions—it is a baseline way of life.
The 2026 Verdict
Spain isn't perfect. Navigating the paperwork can still test the patience of a saint, and keeping up with evolving tax and residency rules requires a sharp eye. But when you weigh the minor frustrations against the daily reality of safety, sunshine, community, and cutting-edge infrastructure, the balance sheet isn't even close.
Spain doesn't just change your location; it changes your pace, your health, and your perspective on what a "good life" actually looks like.
What about you? Whether you've been here for twenty years or are still planning your move, what do you rate most highly about Spain in 2026? Drop your thoughts into the comments section.
2
Like
Published at 8:41 PM Comments (4)
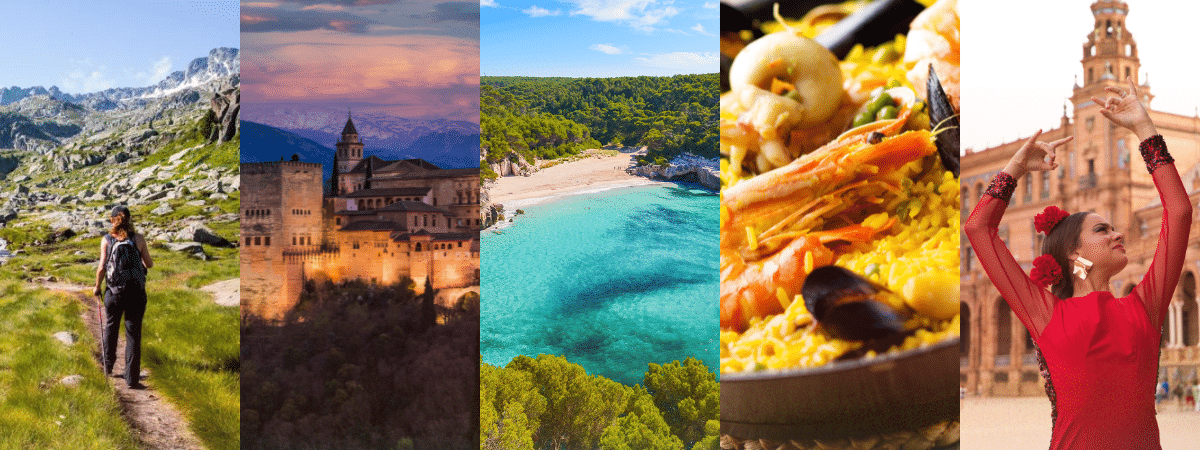
Aioli - How to make it and how to cheat!
Friday, May 8, 2026
 'Aioli', ‘All-i-Oli’ or ‘Ajo Aceite’ in Castilian Spanish, is probably the simplest and one of the hardest recipes you will ever try to make. Simple, because traditionally it only has three ingredients, and hard because it will make you break out in a sweat, especially if you make it in summer! 'Aioli', ‘All-i-Oli’ or ‘Ajo Aceite’ in Castilian Spanish, is probably the simplest and one of the hardest recipes you will ever try to make. Simple, because traditionally it only has three ingredients, and hard because it will make you break out in a sweat, especially if you make it in summer!
All-i-Oli is often translated and served as garlic mayonnaise, but in fact, it is not mayonnaise at all; it's not far off mayonnaise, but it isn’t mayonnaise.
This is probably the recipe where your choice of olive oil is most important, as it is the main ingredient and is pretty much 90% of the final product. So if you want to make it you need to find a very good quality extra virgin olive oil, which is fruity but not too bitter and not very pungent. The variety Arbequina is by far the best due to its high quantity of linoleic acid (an essential fatty acid) that favours the cohesion of emulsions and sauces. However, any good extra virgin will do. Cornicabra is very popular as is Serrana de Espadán here in Valencia. But if you can’t find these varieties, look for an Extra Virgin ‘Suave’. I have read many recipes throughout the net suggesting sunflower oil and refined oils for this recipe. Please do not use these types of oils as they will definitely not give you the same result and are far less healthy.
The recipe I am going to share with you is the authentic one, the one passed on from generation to generation, not the popular garlic mayonnaises being offered around most of Spain (However, I will also tell you how to make that towards the end of the post). It is a recipe that dates back thousands of years and has spread all over the Mediterranean, so I can assure you it was never made with refined olive oil or sunflower oil. Basically, All-i-Oli is an emulsion of olive oil, garlic and salt, nothing else. The secret to the recipe is in the technique, which does take a bit of practice. This is not mayonnaise, a traditional recipe that originated from Mahon in Menorca, as it does not use egg yolk or lemon. In the case of mayonnaise, it is the egg that acts as the emulsifying agent and with All-i-Oli, it is the garlic that has the emulsion-producing properties.
Ingredients
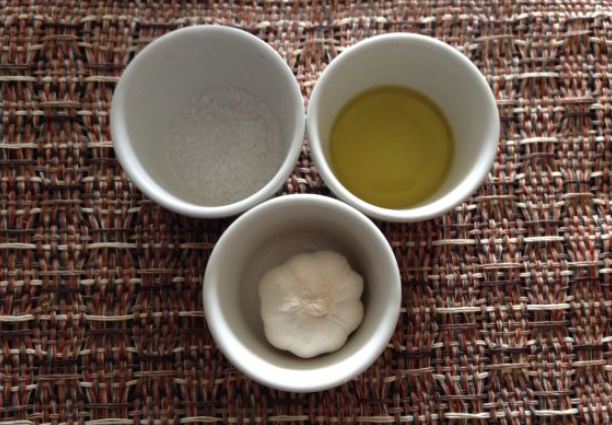
Extra Virgin Olive Oil
Garlic
& Rock Salt
How do we make it the traditional way?
To start with, we need a pestle and mortar, not a blender or a mixer. This is a traditional recipe and must be done by hand to achieve the best results.
For this recipe, we will use 100ml of olive oil and 3-4 large cloves of garlic. Depending on how strong you like it, you can add more or fewer cloves to the recipe. As this involves a substantial amount of garlic, it is a good idea to remove the roots of the cloves before starting. This means slicing it down the middle, lengthwise and taking out the core of the garlic. This will help reduce the characteristic bad breath and the taste of garlic coming back up throughout the day. It is the root of the garlic that our stomach finds so hard to digest, and it just seems to linger around for most of the day!
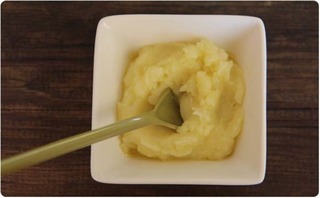
Once the garlic is peeled and the cores removed, place them in the mortar with a pinch of rock salt and start grinding them. Once we have a lumpy paste, we need to start adding the olive oil. It is very important not to add too much or too quickly. Patience is a virtue with this recipe. Start by adding the oil drop by drop and move the pestle in a circular action from left to right, following the hands of the clock. Once you have started this action, you should not stop until the Ali Oli is ready.
This is when it gets a bit tiring, as you need to apply force as well and keep the pestle moving at a constant speed to draw out the juice from the garlic. Slowly you start adding more olive oil, little by little but always waiting until the previous dose has blended with the emulsion. This continues until you end up with a thick sauce/paste or find the consistency that you prefer. The whole process can take up to 15 minutes. You will probably have problems along the way to achieve an emulsion, it takes practice and isn’t as easy as it sounds but it is really worth the effort! Here is a video that might help ...
.jpeg) .jpeg)
For those of you who find it too difficult, there are a couple of tricks that help to keep the garlic moist and facilitate the cohesion of the emulsion. One is adding 3 teaspoons of freshly squeezed lemon juice to the mortar at the same time you add the garlic and the salt. This will help you keep the emulsion stable and also reduce the pungency of the garlic a little bit more.
GARLIC MAYONNAISE.....and cheating
Finally, if you prefer garlic mayonnaise, which isn't as strong, the only thing you have to add is an egg yolk (no egg white) to the garlic with the lemon juice before you start adding the olive oil. Another trick which works with either recipe is making a little ball of dough from a loaf of sliced bread and wetting it with water. You add this dough ball when you add the egg or just before adding the oil and grind it into the mixture, this will help create the emulsion and stop it from separating!
No time? Don't mind cheating a little?....
Although this may be cheating I know dozens of restaurants on the Balearic islands which use this quick method for their popular 'Pan y All-i-Oli' (one of them told me about it) and it goes down a treat, I use it too and to be honest and I have grown to love it!. Sometimes I just find All-i-Oli too strong and this is just perfect. All you will need is the following:
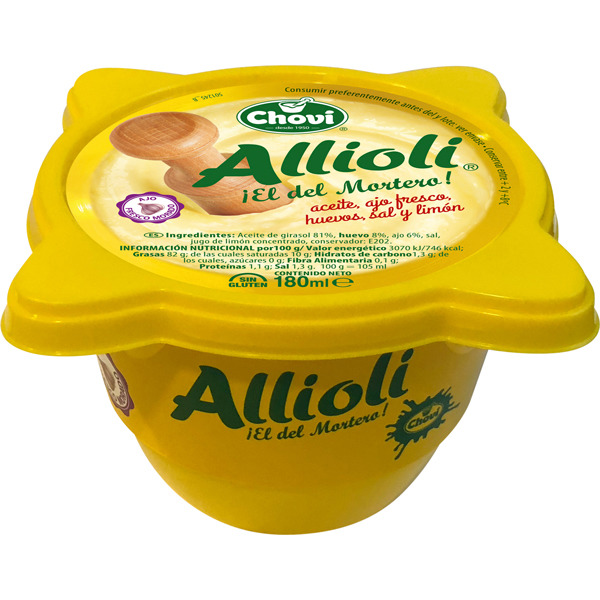  
1. Tub of fresh All-i-Oli from the supermarket
2. Hellman's Mayonnaise (Do not substitute for a different mayonnaise)
3. Finely ground Black Pepper
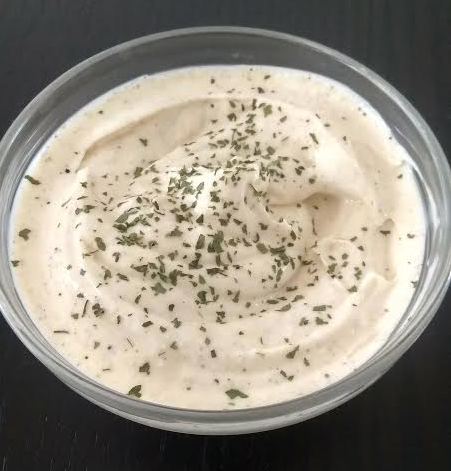
Quite simply, add equal parts of Allioli and Hellman's mayonnaise to a bowl and sprinkle in some black pepper. Mix well until completely blended, sprinkle a little chopped parsley on top and serve with some crispy bread.
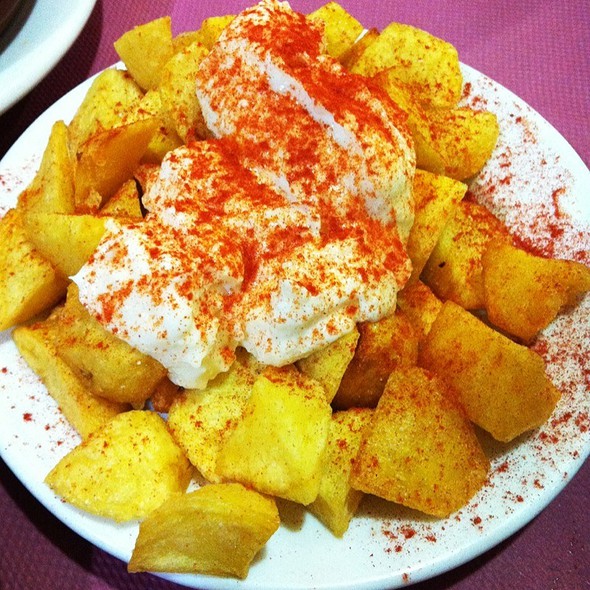
In Valencia, it is particularly common to eat All-i-Oli with anything from fried potatoes seasoned with paprika or Black rice which is a dish that uses the ink from squids. It is very versatile and fantastic with vegetables, fish and meats so use it to accompany anything you want.
2
Like
Published at 4:08 PM Comments (0)
Gazpacho Andaluz - the heat is getting closer
Friday, May 1, 2026
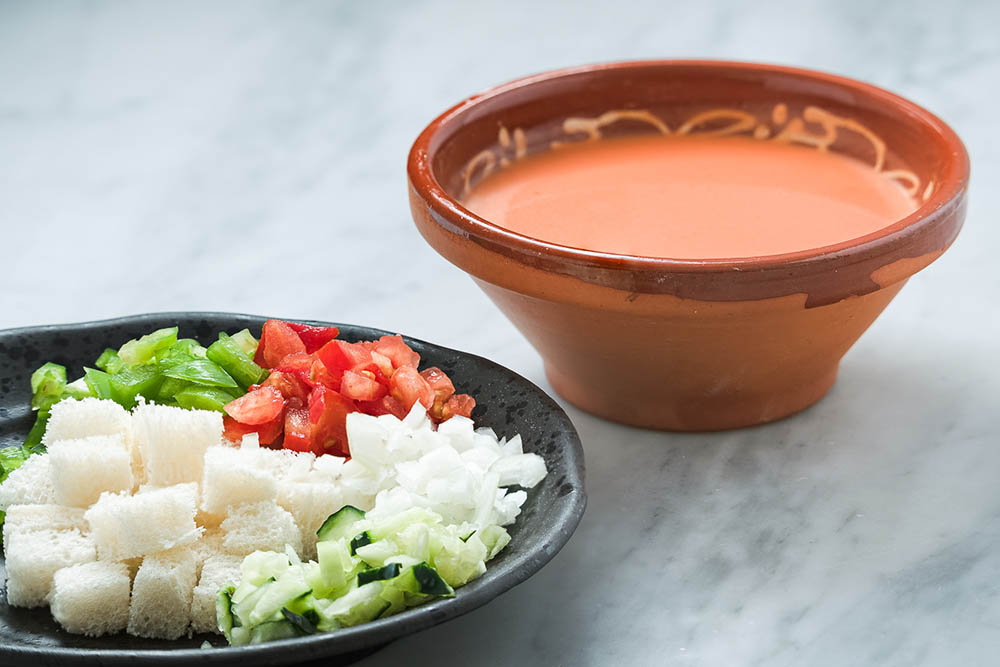
Gazpacho is one of the most international dishes of Spanish gastronomy. Refreshing, low in calories and very easy to make. It is one of the star dishes of the summer, which, accompanied by a bit of crusty bread and a delicious dessert, will provide a solution to many of our meals this coming summer.
Making gazpacho, in principle, is quite a simple task, but like everything else, it has its tricks and you will eventually tweak it to your liking the more your make it.
The most popular version of the recipe for this cold soup is tomato, pepper, onion, garlic, cucumber, bread, and oil. Despite the fact that many think that gazpacho is originally from Andalusia, it has been proven that previous recipes already existed. However, there is no doubt that this one is the most famous version of them all. Most versions of this recipe will vary depending on the amounts of vegetables you used, which is why there are so many different flavours, everyone has different tastes - some prefer more garlic, some less, some more cucumber, some less, in the end, it's really up to you! But as a starting point this is what you need:
Ingredients
800 grams of ripe tomato
1 onion
2 cloves of garlic
1 green pepper
1 red bell pepper
Spanish half cucumber
150 grams of stale bread
1 teaspoon of sweet paprika
1 tablespoon cumin mocha
Salt
1 glass of extra virgin olive oil
1/3 of a glass of sherry vinegar
Water
Steps to take:
Wash all the vegetables well, cut them into medium-sized pieces and put it all in a bowl. Add half of the oil, the vinegar, the salt, the paprika, the cumin and a little water and leave it to marinate in the refrigerator.
After a few hours of marinating, take the vegetables out of the fridge, blend them with a mixer and pass the mixture through a sieve. Then, use the blender again and while blending, add the rest of the oil little by little and ... that's it! All you have to do now is to season with salt and add a little extra vinegar if you prefer more of a kick. You can decorate the gazpacho with some chopped cucumber, peppers and toasted croutons.
As you can see, making gazpacho is really very simple. Adapt the recipe as you see fit and start experimenting! One piece of advice - try and find the best quality ingredients possible - especially the tomatoes, and you can't go wrong.
3
Like
Published at 3:53 PM Comments (2)
Easter Food in Spain
Friday, April 3, 2026
At Easter, Spain comes alive with an array of vibrant traditions, including the culinary delights unique to this time of year. The rich tapestry of Spanish cuisine is on full display during Semana Santa, with each region showcasing its own special dishes that are steeped in history and tradition. From hearty soups to delectable sweets, Easter in Spain is a feast for the senses. Let's embark on a gastronomic tour of some typical dishes enjoyed across the different communities of Spain during this festive period.
Sopa de ajo, Castilla y León

Our culinary journey begins in Castilla y León, where the aroma of Sopa de ajo fills the air during Semana Santa. Also known as sopa castellana, this hearty soup is a popular choice, especially after the gruelling processions of Viernes Santo. Made with garlic, paprika, eggs, olive oil, and bread instead of noodles, this dish has its roots in frugality, using leftover bread from previous days. Sopa de ajo is a comforting and flavourful dish that warms both the body and soul.
Patatas viudas, La Rioja
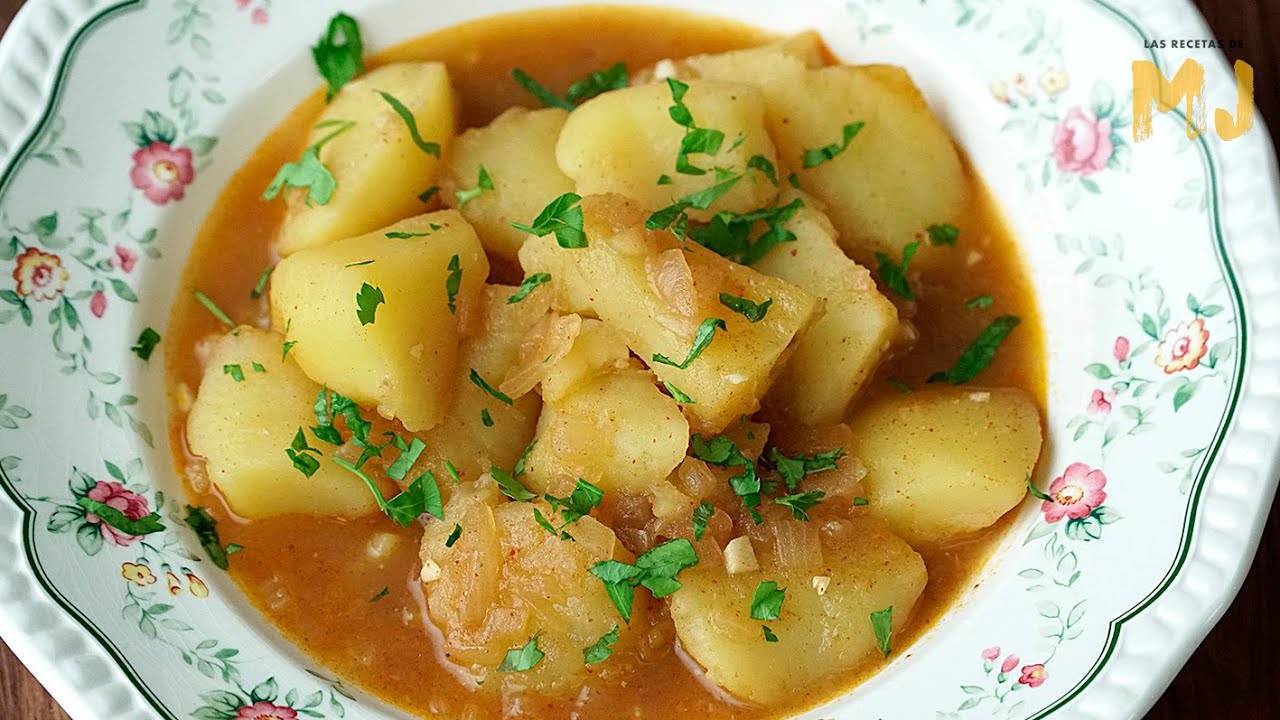
Travelling to La Rioja, we encounter another Easter staple, the Patatas viudas. The name, which translates to "widow potatoes," pays homage to the absence of meat in this traditional dish. Made with potatoes, peppers, onions, garlic, paprika, olive oil, salt, and bay leaves, this simple yet delicious recipe captures the essence of La Rioja's culinary heritage.
Garbanzos con espinacas, Seville
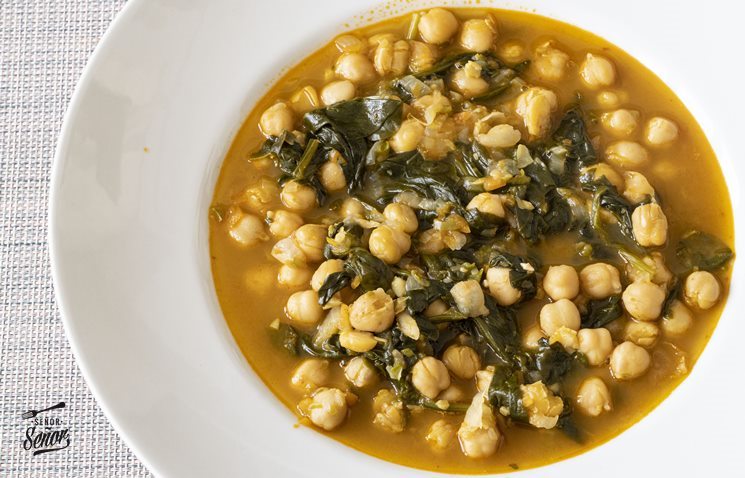
A trip to Seville during Semana Santa would be incomplete without tasting Garbanzos con espinacas. A popular alternative to the traditional 'potaje', this dish features chickpeas and spinach, creating a flavoursome and hearty meal. Garbanzos con espinacas showcases the culinary diversity of Seville and is a must-try for those exploring the region's gastronomic traditions.
Bacalao al pil pil, Basque Country
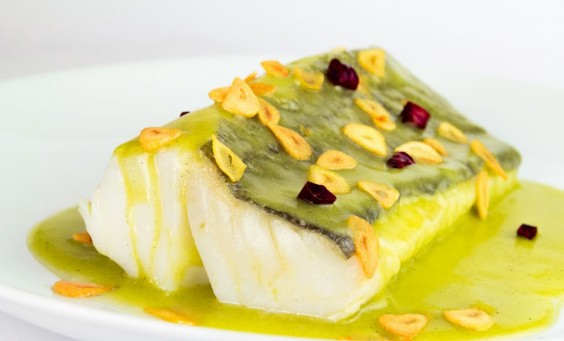
In the Basque Country, Easter is synonymous with Bacalao al pil pil, a dish that exemplifies the region's love for cod. Made with cod, garlic, olive oil, and a touch of spice from chillies or cayenne pepper, Bacalao al pil pil is a delicacy that tantalises the taste buds. The luscious sauce created from the gelatin released by the fish during cooking adds a richness and depth of flavour to this iconic Basque dish.
Pa torrat, Alicante
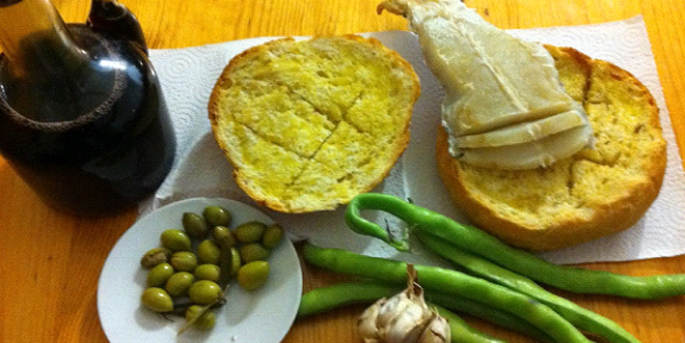
Journeying to the province of Alicante, we discover Pa torrat, a traditional dish that has been enjoyed by locals for centuries. Consisting of bread drizzled with olive oil, garlic, and cod, Pa torrat has its origins in the 19th century when it became a popular choice for the faithful looking to refuel during Viernes Santo. Pa torrat continues to be a cherished dish during Easter, often complemented with other ingredients to suit individual tastes.
Hornazo, Zamora

In Zamora, particularly in Salamanca, Hornazo takes centre stage as a savoury treat enjoyed during the post-Easter festivities known as Lunes de Aguas. This empanada-style dish is filled with a medley of ingredients such as chorizo, pork loin, bacon, and boiled eggs, creating a symphony of flavours that delight the palate. Hornazo is a gastronomic tradition that celebrates the end of Lent and the return to indulging in meat once again.
Tortillas de camarón, Cádiz

Heading south to Cádiz, we encounter Tortillas de camarón, a popular choice of appetiser during Semana Santa. These crispy prawn fritters are a delightful accompaniment to the festivities, crafted from prawns, chickpea flour, onions, parsley, and a hint of spice. Tortillas de camarón showcase the culinary ingenuity of Cádiz and are a true testament to the region's seafood heritage.
Monas de pascua, Mediterranean region
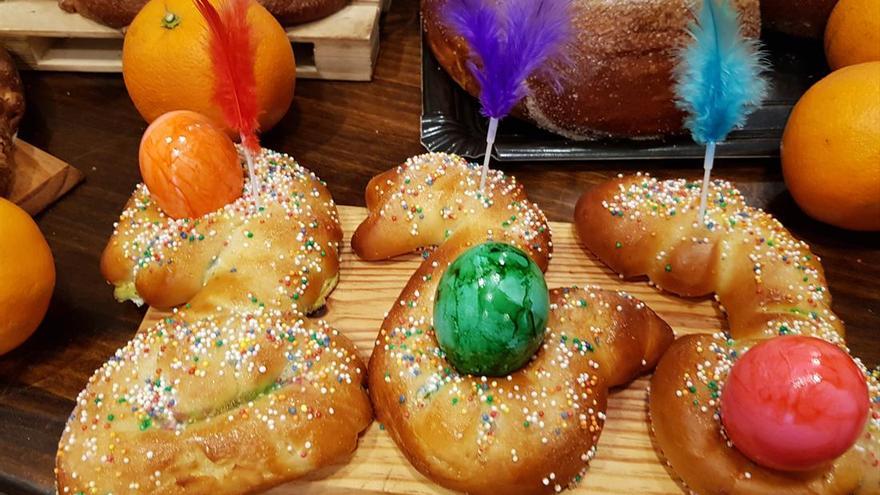
As Easter approaches, the allure of sweet treats takes centre stage across Spain. Monas de pascua, a traditional Easter pastry, is a beloved delicacy in various regions such as Murcia, Valencia, Catalonia, and Castilla-La Mancha. This round bread-like pastry with a central egg, whether boiled or chocolate, symbolises new beginnings and abundance, making it a cherished Easter tradition for families and communities.
Pestiños, Andalusia
Delving into the world of sweet delights, we discover Pestiños, a Moorish-inspired treat that captivates the taste buds of those in Andalusia. These square-shaped pastries are crafted from flour, lard, white wine, aniseed, and citrus zest, offering a perfect balance of textures and flavours. Pestiños are often drizzled with sugar or honey, adding a touch of sweetness to this iconic Easter indulgence.
Leche frita, Palencia
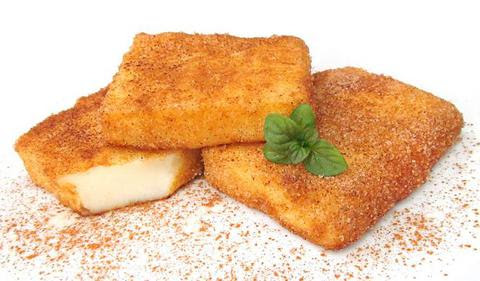
Hailing from Palencia in the north of Spain, Leche frita is a popular dessert beloved for its creamy texture and comforting aroma. This delectable sweet is made from milk, flour, and sugar, cooked until thickened to create a velvety custard. It is often served with a sprinkling of cinnamon, sugar, chocolate, coconut, lemon zest, or caramel, adding a delightful twist to this classic Easter treat.
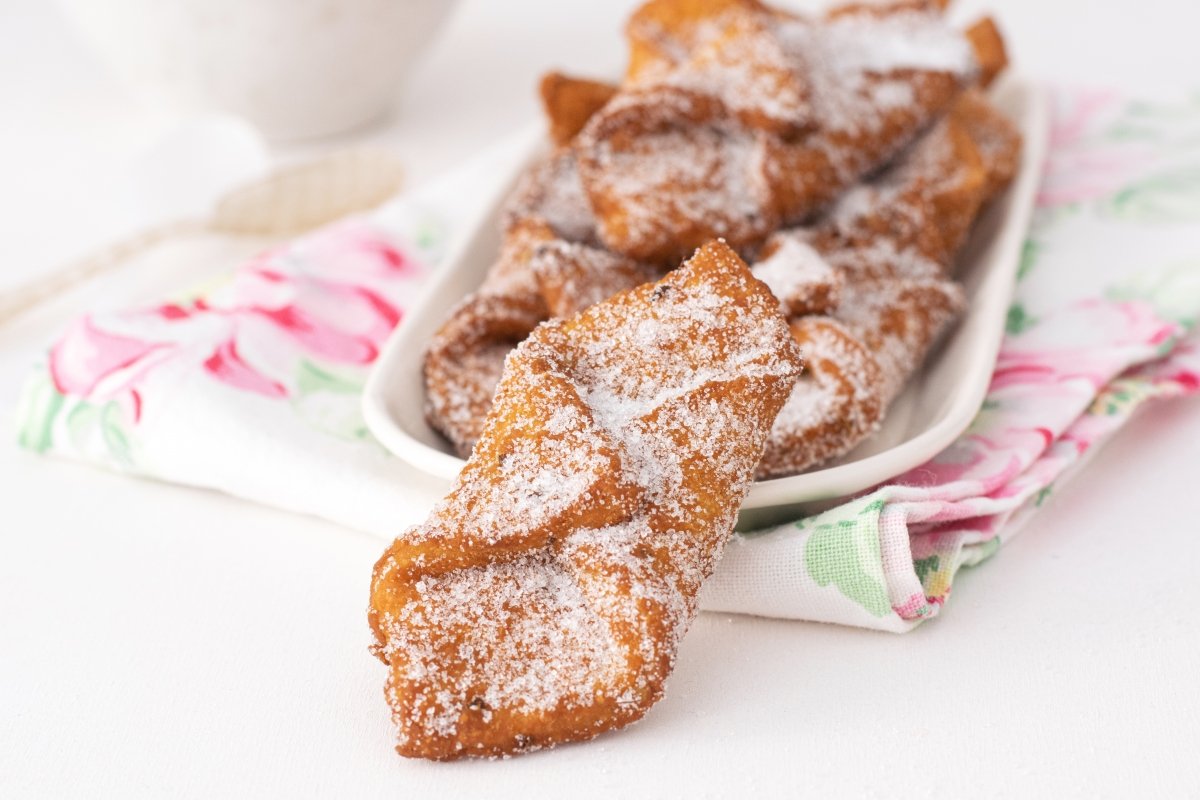
Torrijas and Buñuelos
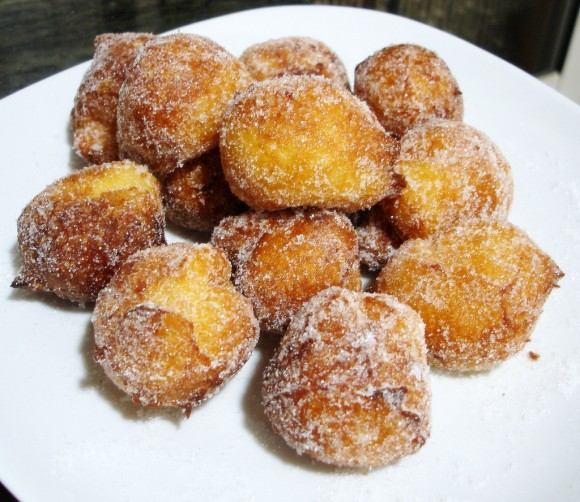
No Easter feast in Spain would be complete without the presence of Torrijas and Buñuelos, two ubiquitous desserts that have stood the test of time. Torrijas, made from bread soaked in milk, cinnamon, egg, and sugar, offer a decadent and indulgent treat. Meanwhile, Buñuelos, a staple in Madrid, are delectable fritters that boast a light and airy texture, perfect for satisfying sweet cravings during the Easter celebrations.
Semana Santa in Spain is not only a time of reflection and spirituality but also a time to indulge in the country's diverse culinary landscape. From savoury delights to sweet temptations, the traditional dishes of Easter in Spain offer a glimpse into the rich tapestry of flavours that define the nation's gastronomy. So, as you immerse yourself in the Easter festivities, remember to savour these unique and time-honoured dishes that exemplify the essence of Spanish culinary heritage
3
Like
Published at 7:28 PM Comments (0)
Making Table Olives in Spain
Friday, March 20, 2026
People often think that table olives can come straight off the tree and into a jar with perhaps some seasoning, but this is not the case and far from it. The substance that renders it essentially inedible is oleuropein, a phenolic compound bitter enough to shrivel your teeth. The bitterness is a protective mechanism for olives, useful for fending off invasive microorganisms and seed-crunching mammals. In the wild, olives are dispersed by birds, who avoid the bitterness issue by swallowing them whole. Given the awfulness of the "au natural" olive, you can’t help but wonder why early humans, after the first appalling bite, didn’t shun the olive tree forever.
The olive is a drupe or stone fruit, like cherries, peaches, and plums, in which a fleshy outer covering surrounds a pit or stone, which in turn encases a seed. In the case of the olive, the outer flesh contains up to 30 per cent oil—a concentration so impressive that the English word oil comes from the ancient Greek "Elaia", which means olive. But it also has a low sugar content from 2.6-6% when compared with other drupes which have on average 12%.
Due to these characteristics, it makes it a fruit that cannot be consumed directly from the tree and it has to undergo a series of processes that differ considerably from region to region, and which also depend on the variety of olive. Some olives are, however, an exception to this rule because as they ripen they sweeten right on the tree, in most cases this is due to fermentation. One case is the Thrubolea variety in Greece, however, this is not at all common.
The oleuropein, which is distinctive to the olive, has to be removed as it has a really strong bitter taste and those who have eaten an olive straight off the tree know what I am talking about: it is not, however, pernicious to health. It just tastes terrible. Depending on local methods and customs, the fruit is generally treated in sodium or potassium hydroxide, brine or successively rinsed in aerated water, a rather complicated process.
The olive's suitability for table consumption is a function of its size, which is important for presentation. Olives between 3 and 5g are considered medium-sized, while those weighing over 5 g are large. The stone should come away easily from the flesh and a ‘flesh to stone’ ratio of 5 to 1 is considered acceptable. The higher this ratio the better the commercial value of the olives. The skin of the fruit should be fine, yet elastic and resistant to blows and to the action of alkalis and brine.
High sugar content in the flesh is an asset. The lowest acceptable level is 4%, especially in olives that undergo fermentation. For table olives, oil content should be as low as possible because in many cases it impairs the keeping properties and consistency of the processed fruit. Only in certain types of black olives is a medium to high oil content desirable.
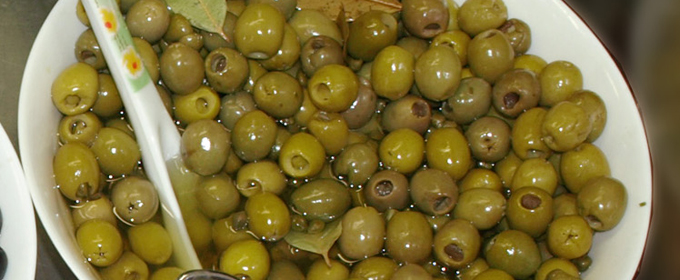
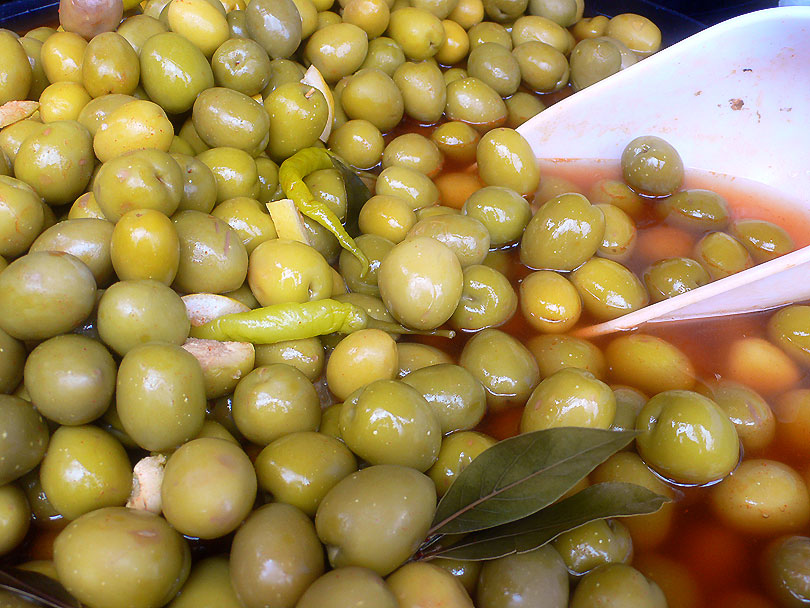
In Spain, most of the table olives are green olives. These are obtained from olives harvested during the ripening cycle when they have reached their normal size, but prior to colour change. They are usually hand-picked when there is a slight change in hue from leaf-green to slightly yellowish green and when the flesh begins to change consistency but before it turns soft. Colour change should not have begun. Trials have been run to machine harvest table olives, but owing to the high percentage of bruised fruit they had to be immersed in a diluted alkaline solution while still in the orchard, this being said table olives are still in their majority harvested by hand. Recently harvested, the olives should be taken to the plant for processing on the same day.
Green olives are processed in two principal ways: with fermentation, which is considered the Spanish style, and without fermentation, which is considered the Picholine or American style.
In Spain the majority of olives are treated in a diluted lye solution (sodium hydroxide) to eliminate and transform the oleuropein and sugars, to form organic acids that aid in subsequent fermentation, and to increase the permeability of the fruit. The lye concentrations vary from 2% to 3.5%, depending on the ripeness of the olives, the temperature, the variety and the quality of the water. The treatment is performed in containers of varying sizes in which the solution completely covers the fruit. The olives remain in this solution until the lye has penetrated two-thirds of the way through the flesh. The lye is then replaced by water, which removes any remaining residue and the process is repeated. Lengthy washing properly eliminates soda particles but also washes away soluble sugars, which are necessary for subsequent fermentation.
Fermentation is carried out in suitable containers in which the olives are covered with brine. Traditionally, this was done in wooden casks. More recently, larger containers have come into use that are inert on the inside. The brine causes the release of the fruit cell juices, forming a culture medium suitable for fermentation. Brine concentrations are 9-10%, to begin with, but rapidly drop to 5% owing to the olive's higher content of interchangeable water.
When properly fermented, olives keep for a long time. If they are in casks, the brine level must be topped up. At the time of shipment, the olives have to be classified for the first or second time as the case may be. The original brine is replaced and the olives are packed in barrels and tin or glass containers. Sometimes they are stoned (pitted) or stuffed with anchovies, pimento, etc. The most commonly used varieties in Spain are Manzanillo and Gordal.
But after discovering this you may be thinking, whoever came up with the idea of finding a way to eat a drupe that was at first sight totally inedible and had the patience to even work it out?
Well, it is a bit of a mystery but the general consensus is that it was the Romans who most likely came up with the technique that put the olive fruit itself on the dinner table. Earlier people had discovered that olives could be debittered by soaking them in repeated changes of water, a painstaking process that took many months and was probably discovered by accident. This was somewhat improved by fermenting the olives in brine, which was marginally quicker, but the Romans found that supplementing the brine with lye from wood ashes (sodium hydroxide) cut the time required for producing an edible olive from months to hours.
About 90 per cent of the world’s olive crop goes to make olive oil. The remainder is harvested for table olives which, though there are over 2,000 known olive cultivars, are known to most of us in two colours: green and black.
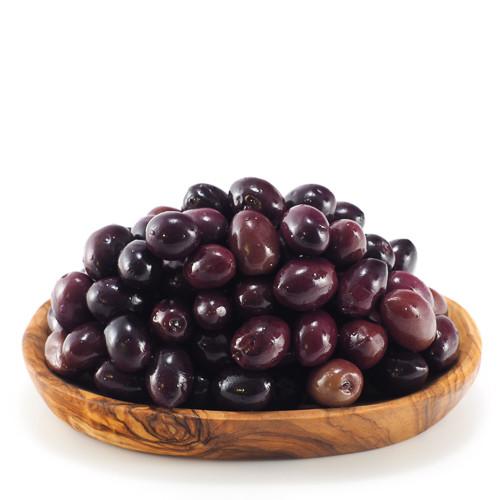
Green olives, the kind found in martinis, are picked green and unripe and then cured. These are often called Spanish olives, as mentioned earlier. Tree-ripened olives, left to themselves, turn purple - not black (as you can see in the image on the left) - due to an accumulation of anthocyanin, the same pigment that puts the purple in Concord grapes.
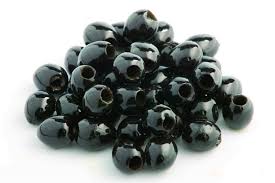
Black olives, though labelled as “ripe” on supermarket cans, actually aren’t: these, a California invention, are green olives that have been cured in an alkaline solution, and then treated with oxygen and an iron compound (ferrous gluconate) that turns their skins a shiny patent-leather black, so they are in fact manipulated and artificial in colour.
4
Like
Published at 9:21 PM Comments (7)
Iberian Pork and Chorizo Casserole
Friday, March 13, 2026
When the weather is really cold, as it happens to be at the moment in England, few things are better than a hot slow-cooked stew to satisfy your appetite. Something wholesome to warm 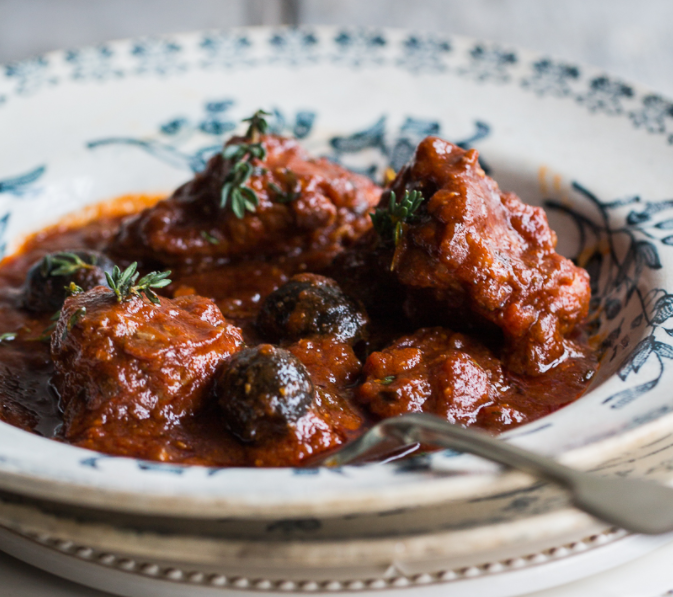 the body. Today I bring you another interesting recipe made with typically Spanish ingredients. A beautifully rich and flavoursome braised pork and chorizo stew. If you have never tried it, it is well worth a go! Who doesn't like chorizo? Unless you are vegetarian of course. It is a recipe I love to accompany with mashed potatoes, not particularly Spanish though! the body. Today I bring you another interesting recipe made with typically Spanish ingredients. A beautifully rich and flavoursome braised pork and chorizo stew. If you have never tried it, it is well worth a go! Who doesn't like chorizo? Unless you are vegetarian of course. It is a recipe I love to accompany with mashed potatoes, not particularly Spanish though!
Although this is not a traditional recipe as such, the result couldn't be more Spanish. Although now isn't an ideal time for getting families together around a table, it is a recipe that will work wonders when feeding numbers. I love how the combination of pork shoulder and chorizo is complemented by the tanginess of the black olives and the sweetness from the paprika to create a tastebud bomb of a recipe which will definitely be a hit.
So why not give it a go and try out this delicious braised pork and chorizo stew. Don't forget the secret to a fantastic result is patience and slow cooking. It takes the time it takes, you just can't rush it. For six people you will need the following - if it is too much, you can always freeze the extra.
INGREDIENTS:
225g chorizo fresh cooking sausage - at most semi-cured
4 tablespoons Extra virgin olive oil
1 kg of lean Iberian pork shoulder, cut into large 3 cm cubes
180 ml of red wine - Crianza is ideal - Mercadona sell a great Crianza for €2,2 (Torre Oria)
2 medium onions, finely chopped
6 large garlic cloves, finely chopped
2 teaspoons sweet smoked paprika
2 tablespoons tomato puree
400g of ripe chopped, skinned plum tomatoes - you can also use tinned
400ml fresh chicken stock - or ready-made stock from the supermarket if you don't have any.
4 springs of thyme, leaves only
2 tablespoons of fresh oregano, chopped
4 bay leaves
3 tablespoons sherry vinegar
salt & pepper
2 teaspoons of caster sugar
110g pitted black olives
INSTRUCTIONS
1. Heat 2 tablespoons of extra virgin olive oil in a large frying pan.
2. Skin and thickly slice the chorizo, add to the heated frying pan and fry on medium heat for 2-3 minutes until the chorizo is lightly browned.
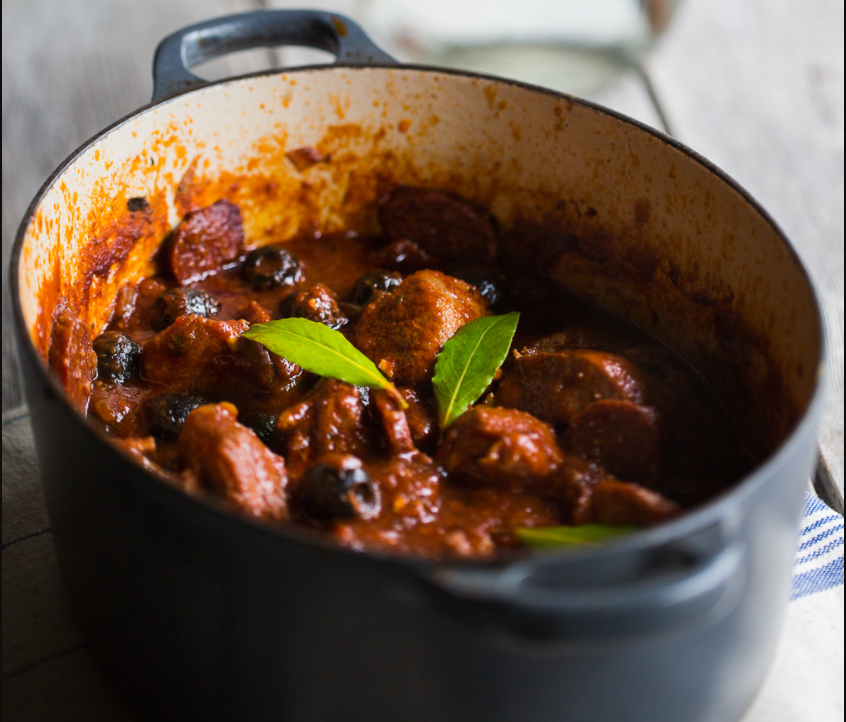
3. Using a slotted spatula, put the chorizo into a large, casserole pot, I use my old faithful Le Creuset pot. Try to keep as much of the oil as possible in the frying pan.
4. Add another tablespoon oil to the frying pan if necessary and brown the pork in batches before adding to the casserole pot.
5. Pour the wine into the frying pan and let it to come to a simmer, deglazing any of the caramelised meat juices stuck to the bottom of the pot. Cook for a few minutes to burn off the alcohol and then pour into the casserole pot.
6. Lower the heat, add the remaining oil and chopped onions to the frying pan and fry gently for 10 minutes or until soft, adding a little more oil if necessary. Add the chopped garlic to the onions and fry for a further 2-3 minutes.
7. Stir in the paprika and then add the tomato puree, chopped tomatoes, chicken stock and herbs. Cook for a couple of minutes and then pour it all over the chorizo and pork in the casserole pot and mix it up well. Season with salt and pepper.
8. Bring the casserole pan to a quick simmer, turn the heat right down to a minimum and cover. Cook for at least 1 hour, stirring from time to time.
9. In a small pan, boil the sherry vinegar and caster sugar until it has reduced to about a teaspoon. Then stir it into the casserole with the black pitted olives.
10. Simmer uncovered for 30 minutes, or until the pork is really tender.
Serve with mashed potatoes or rice or simply eat it on its own with some crusty bread.
Enjoy!
2
Like
Published at 8:49 PM Comments (0)
Puchero Valenciano - Valencian Stew
Thursday, March 5, 2026
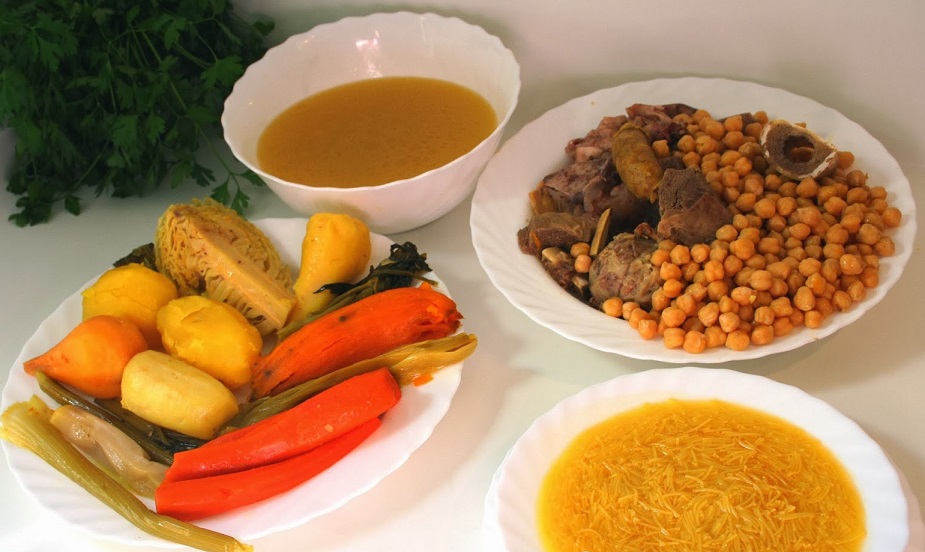
Puchero or Cocido Valenciano is a great winter warmer and although it is very common to see it on the table at Christmas, it is without a doubt one of the most popular 'platos de cuchara' in winter, at least in the Valencian region. Even though we are at the doors of Spring, this is a lifesaver on any cold day. It is, effectively, a stew with giant meatballs, but it is enjoyed in two stages. It may seem very simple and rustic, but it can be a fairly long meal and takes time to digest. It contains almost everything you could possibly imagine putting in a stew. What makes this stew different from the rest of the stews in Spain is the use of local sausages and local vegetables. The Valencian community is well known for its vegetables and this is well portrayed in the Valencian ‘Puchero’.
As with most traditional recipes, there is nothing written in stone, except (traditionally) using a giant cauldron! So grab the biggest pot you can find; otherwise, there is no way all the ingredients will fit in. Remember, the stock, the meat and the vegetables can all be frozen afterwards, so if you have a lot leftover, which you will, ration it out in Tupperware and freeze it for another day or use it for another recipe.
For the stew, you will need the following :
½ medium-sized Chicken (approx. 1,25kg of meat)
2 large meatballs (recipe as follows)
1 piece of bone marrow
1 piece of knee bone
150 grams of beef
1 Blanquet sausage
1 Onion Morcilla sausage
100 grams of pork fat
300 grams of chickpeas (soaked in water overnight)
Saffron
1 stick of Celery, 1 stick of Cardoon, 1 sweet potato, 1 white turnip, 1 yellow turnip, 1 parsnip, 3 potatoes, 3 carrots, 1 leek, 5 runner beans and ¼ cabbage. (As far as the vegetables go, you can chuck in whatever you have at hand, but this is the standard recipe in Valencia)
So, to make the stew it is as easy as cleaning and peeling the vegetables and placing them all in the pot with the meat and the meatballs, except for the carrots, potatoes, runner beans and the morcilla. These need to be held back for later as they cook more quickly. Cover with water and slowly bring to the boil then reduce the heat to low heat and let it simmer for 90 minutes. Remember to skim off the foam that rises to the top. After 90 minutes pop in the rest of the ingredients that were held back and then simmer for another 90 minutes. To make the meatballs all you will need are the following ingredients:
2 eggs.
150g lean minced beef
150g minced pork.
1 sausage (with skin removed)
200g Breadcrumbs
1 tbsp. Fresh chopped parsley
50g Pine nuts
1/2 tsp. Cinnamon powder
10ml fresh Lemon juice
Salt and pepper to taste
Stew net for binding
Cabbage leaves for wrapping up the meatballs.
 12.43.39 - Copy 1.png)  11.38.52 - Copy 1.png)
If you feel like saving some time you can always make the balls the day before. Mix the meat, salt, pepper, parsley, cinnamon, eggs and pine nuts to taste. Pour the breadcrumbs in and knead it all together until it forms a thick mass. Add the lemon juice and knead it all together again. Separate the meat mass into two parts and then roll into two large balls. Once you have made the balls wrap each ball in cabbage leaves and then place it inside the stewing net and tie it up tight and add to the rest of the meat for the stew.
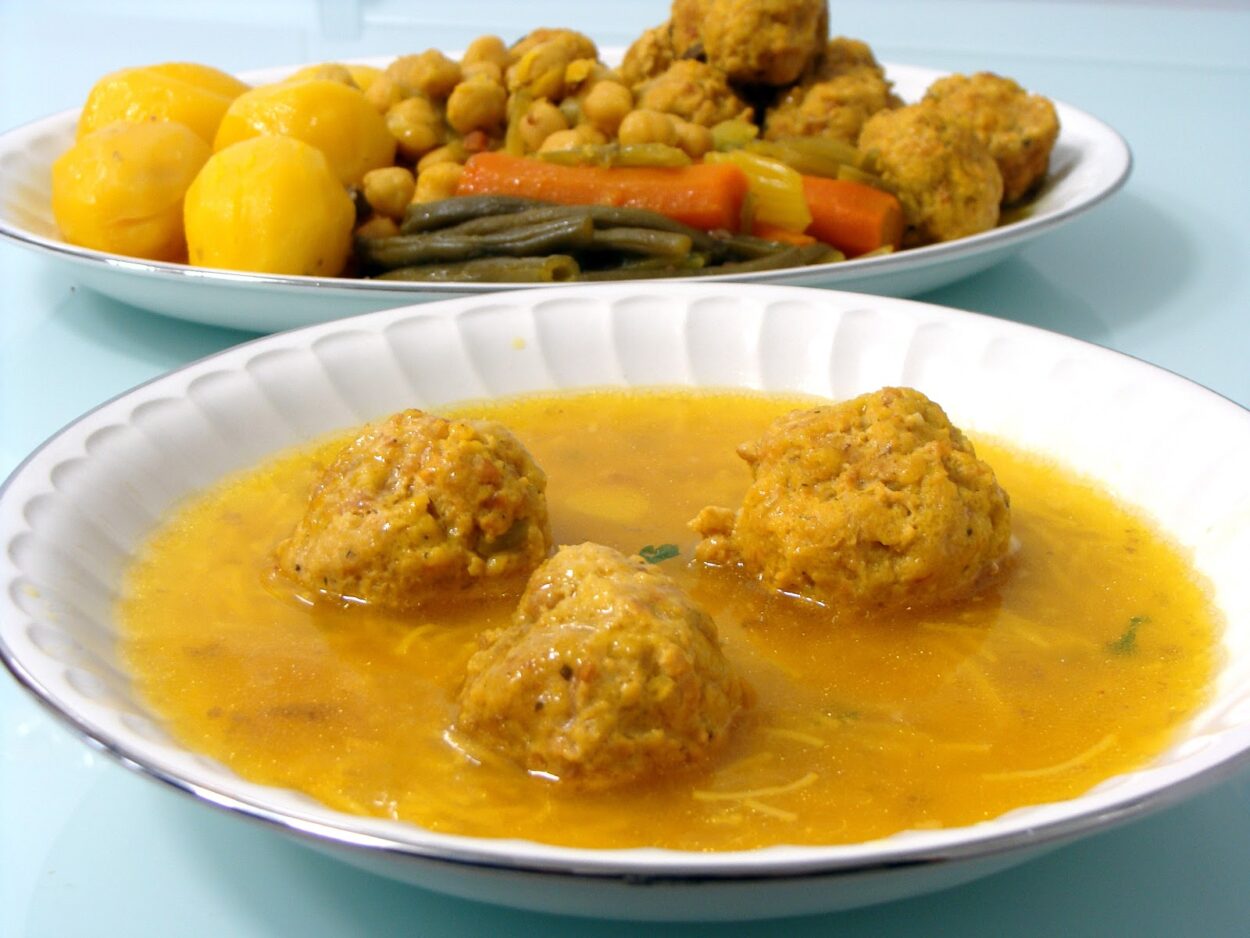
Once the stew is ready it is customary to first enjoy a bowl of soup from the stock cooked either with rice or noodles. Some may add a meatball or two to the soup and others may add a bit of everything and then move on to the rest of the meat and vegetables later, the choice is yours. It would also be customary to make 'oven-baked rice' (Arroz al Horno) the following day with the leftovers.
So there you have it, a very hearty meal from the heart of Valencia and ideal for this time of year, it may not look very sophisticated but it tastes incredible!
Enjoy!
1
Like
Published at 11:15 PM Comments (0)
Spam post or Abuse? Please let us know
|
|